Placetopay - Payment Gateway for Shopify
We offer you global and local payment methods, compatible with your language, and easy to integrate
We offer you global and local payment methods, compatible with your language, and easy to integrate
| Characteristics | |
|---|---|
| Pre-filling buyer information | |
| Partial payments | |
| Skip payment result on placetopay | |
| Lightbox | |
| Customize payment image | |
| Brand management | |
| Allow/Disallow payments with pending orders | |
| Set return page after payment (default, my orders) | |
| Set payment expiration time | |
| Payments by API | |
| Pre-authorization type transactions | |
| Enable/Disable Kount (Anti-fraud service) | |
| Enable/Disable 3DS | |
| Enable/Disable OTP service | |
| Enable/Disable deferred payments (credit selection) | |
| Multistore |
This guide explains, step by step, how to install the PlacetoPay plugin for Shopify. Each configuration parameter described here is demonstrated in a test environment to illustrate the setup in detail.
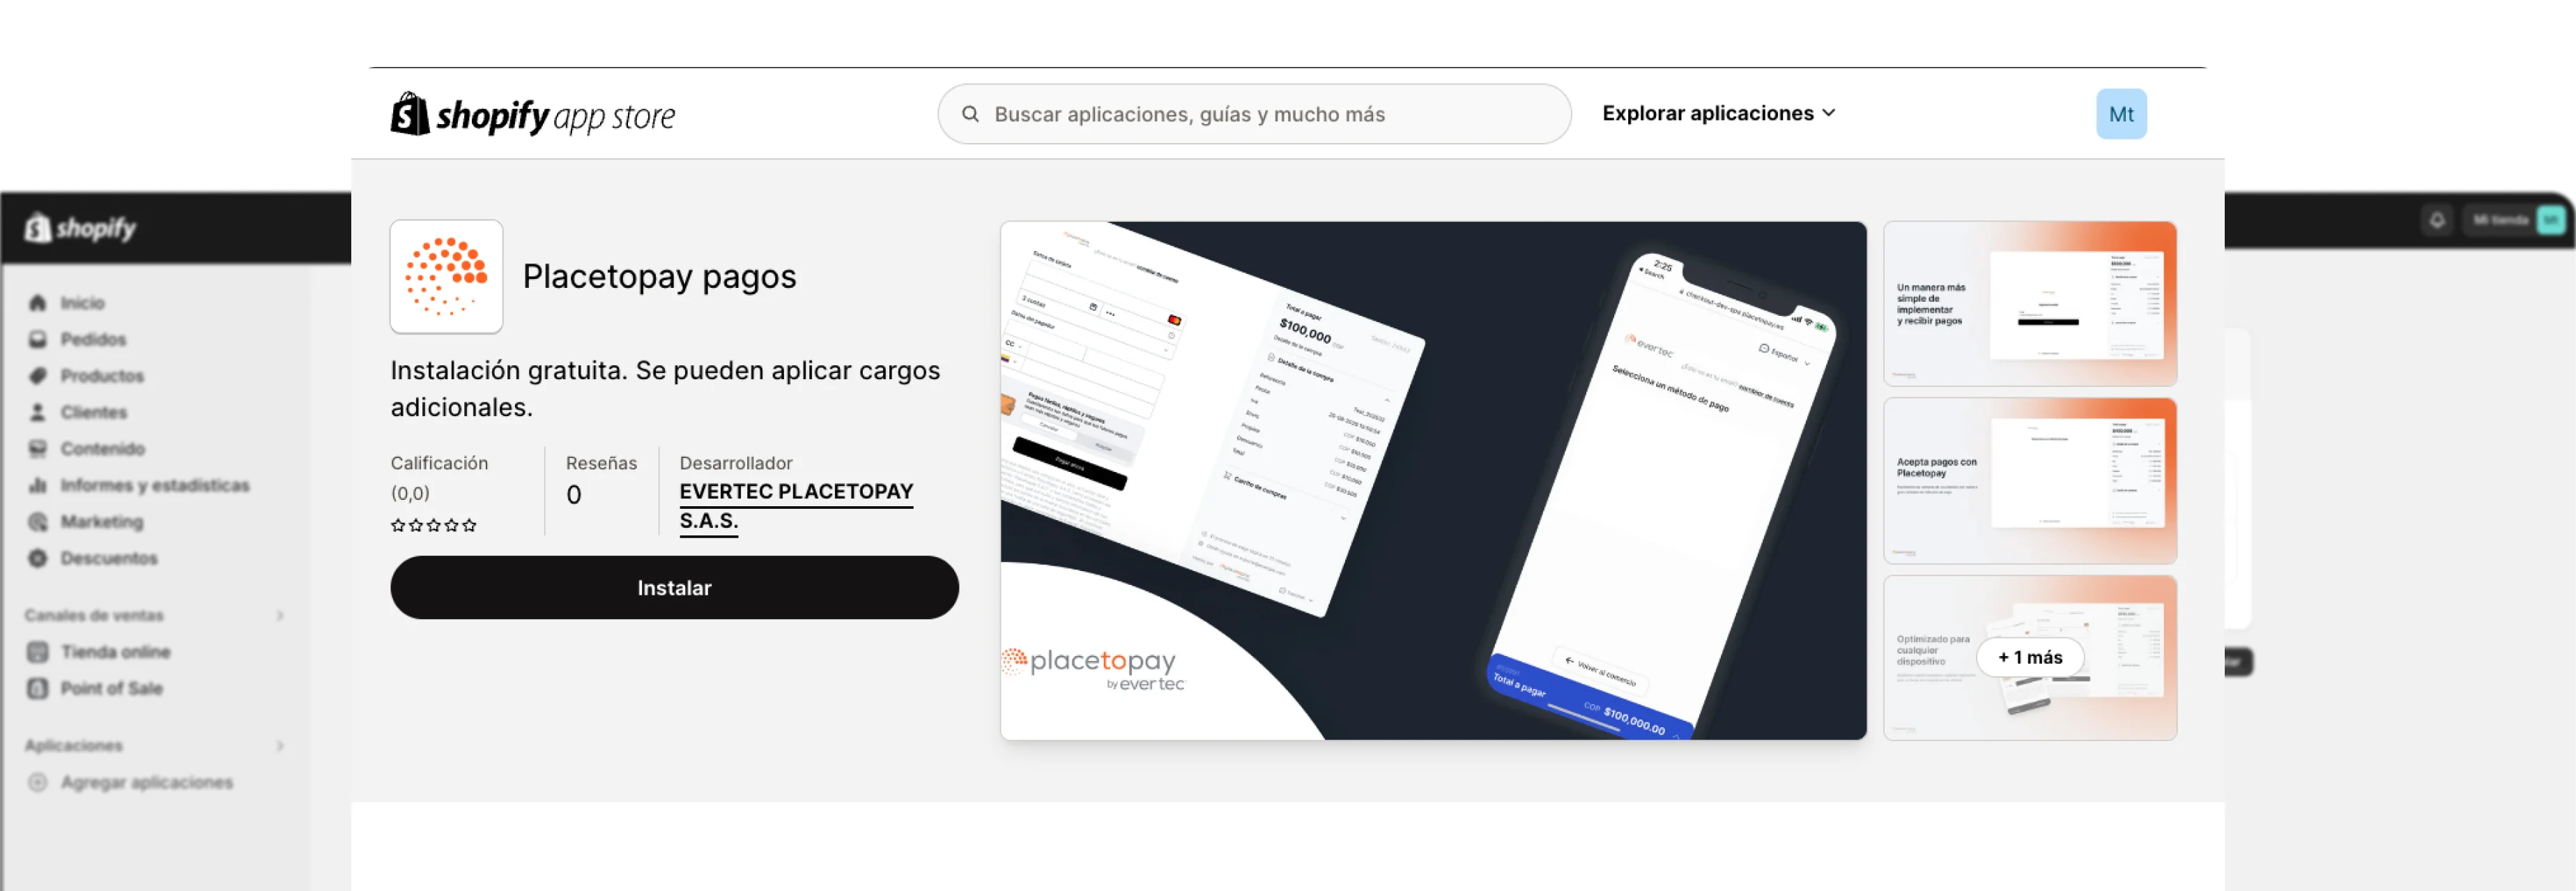
Go to the Shopify / PlacetoPay app page using this URL.
Install the app:
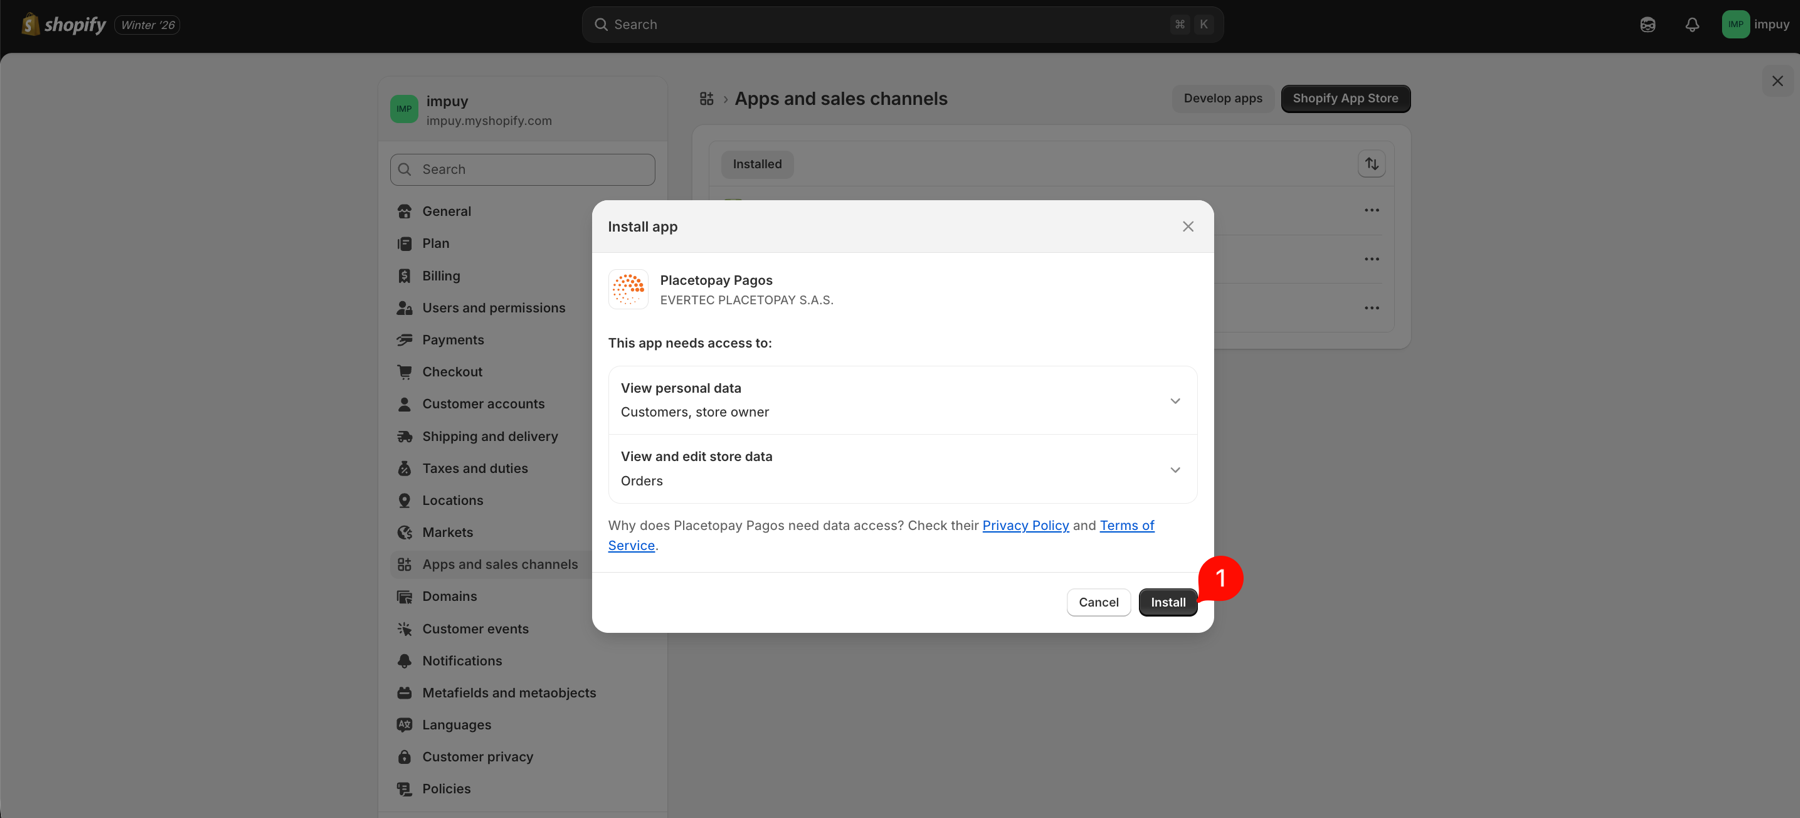
You will be redirected to the payment gateway settings where you must configure the following:
These two values are provided by PlacetoPay. Enter them exactly as received.
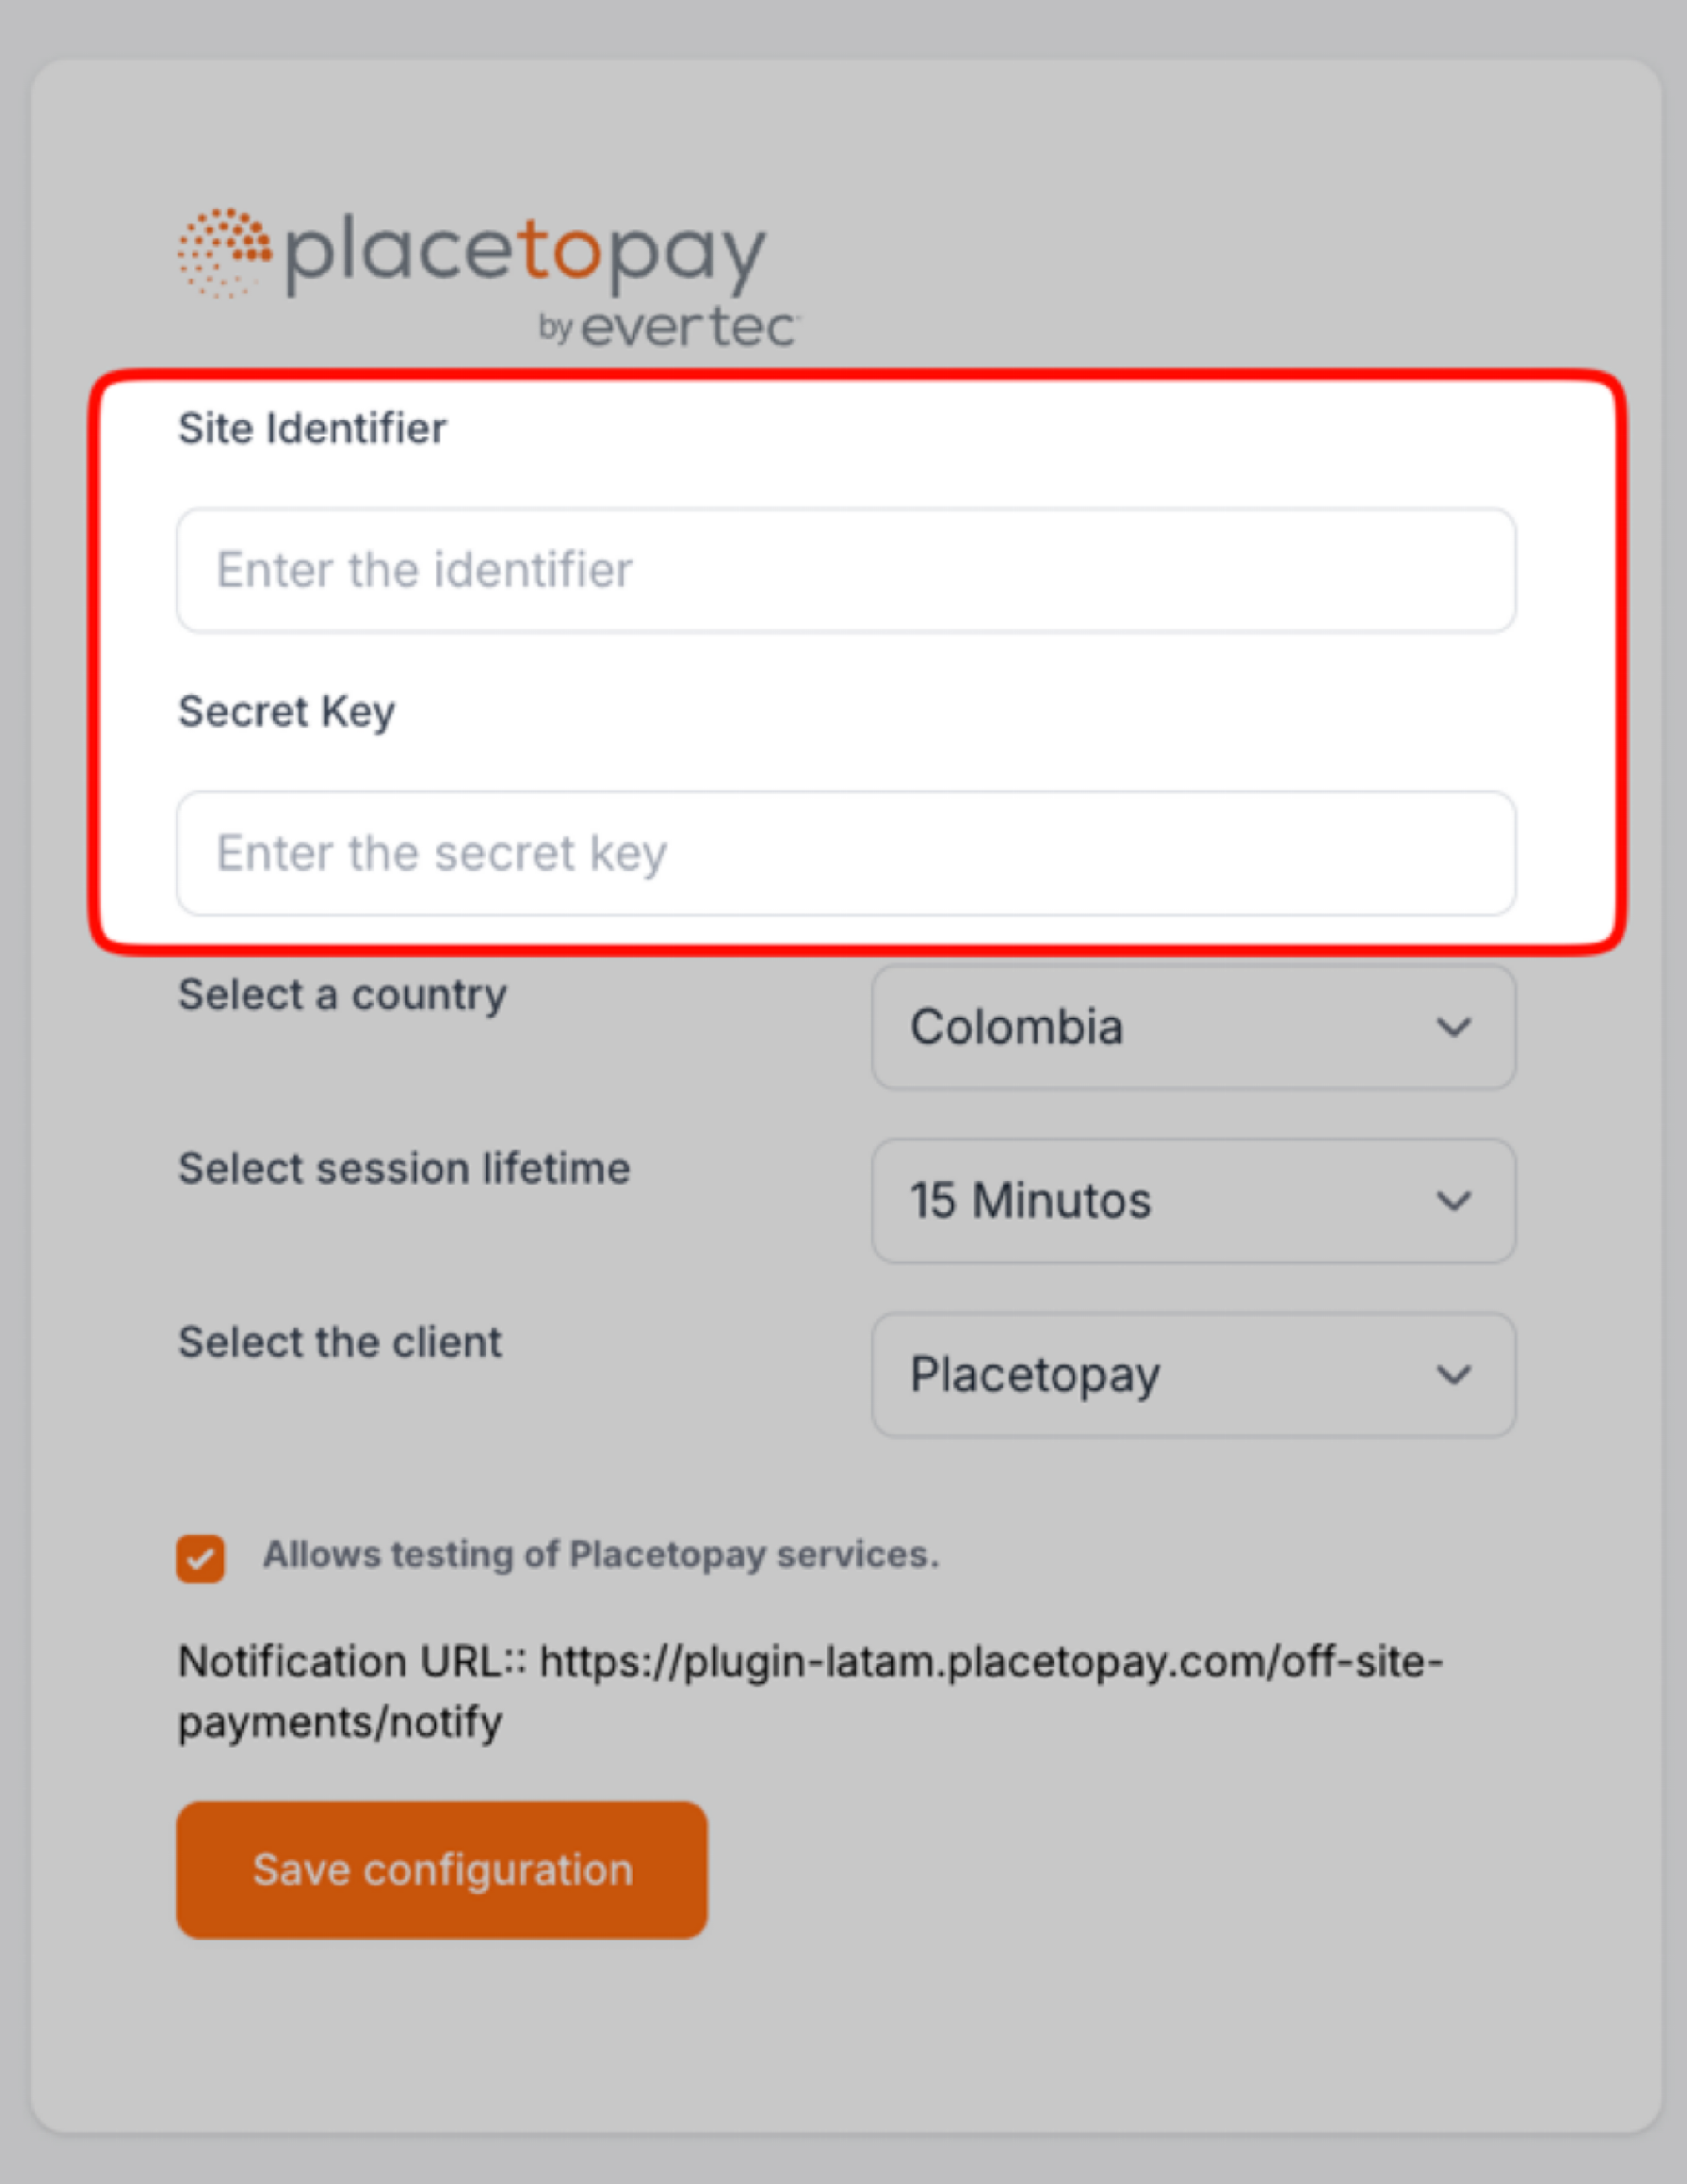
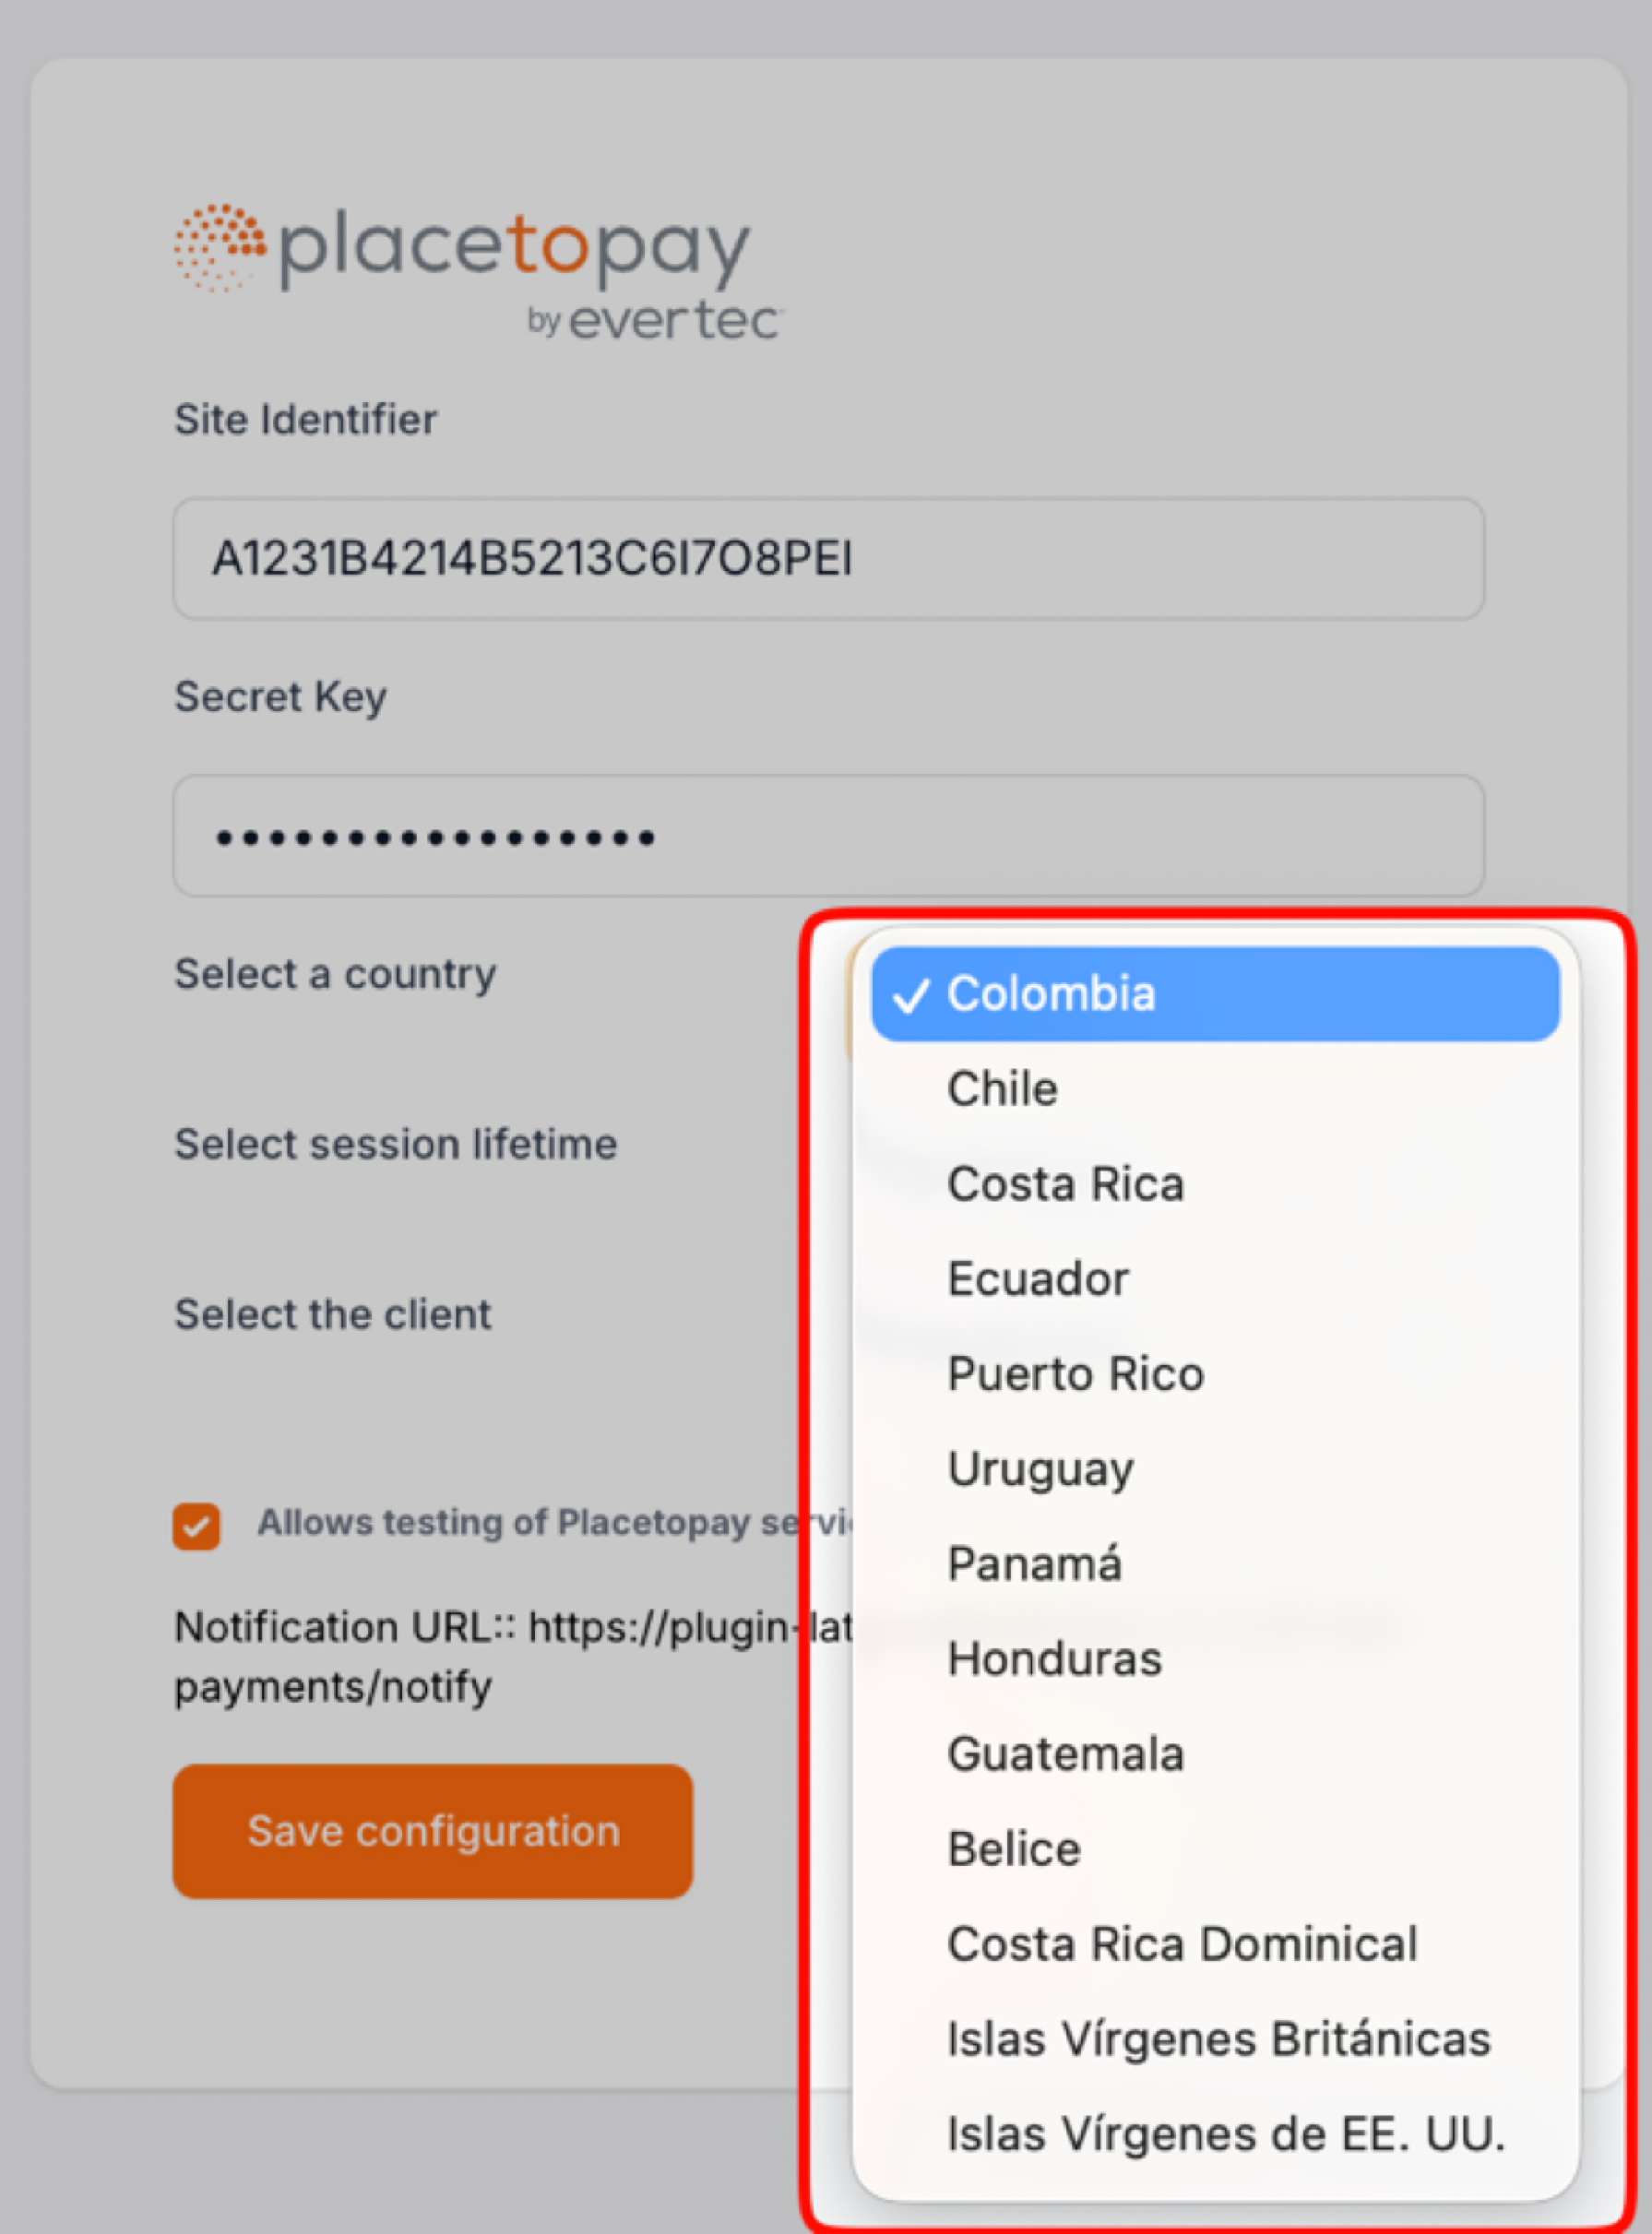
Select the country or provider used for your commercial relationship.
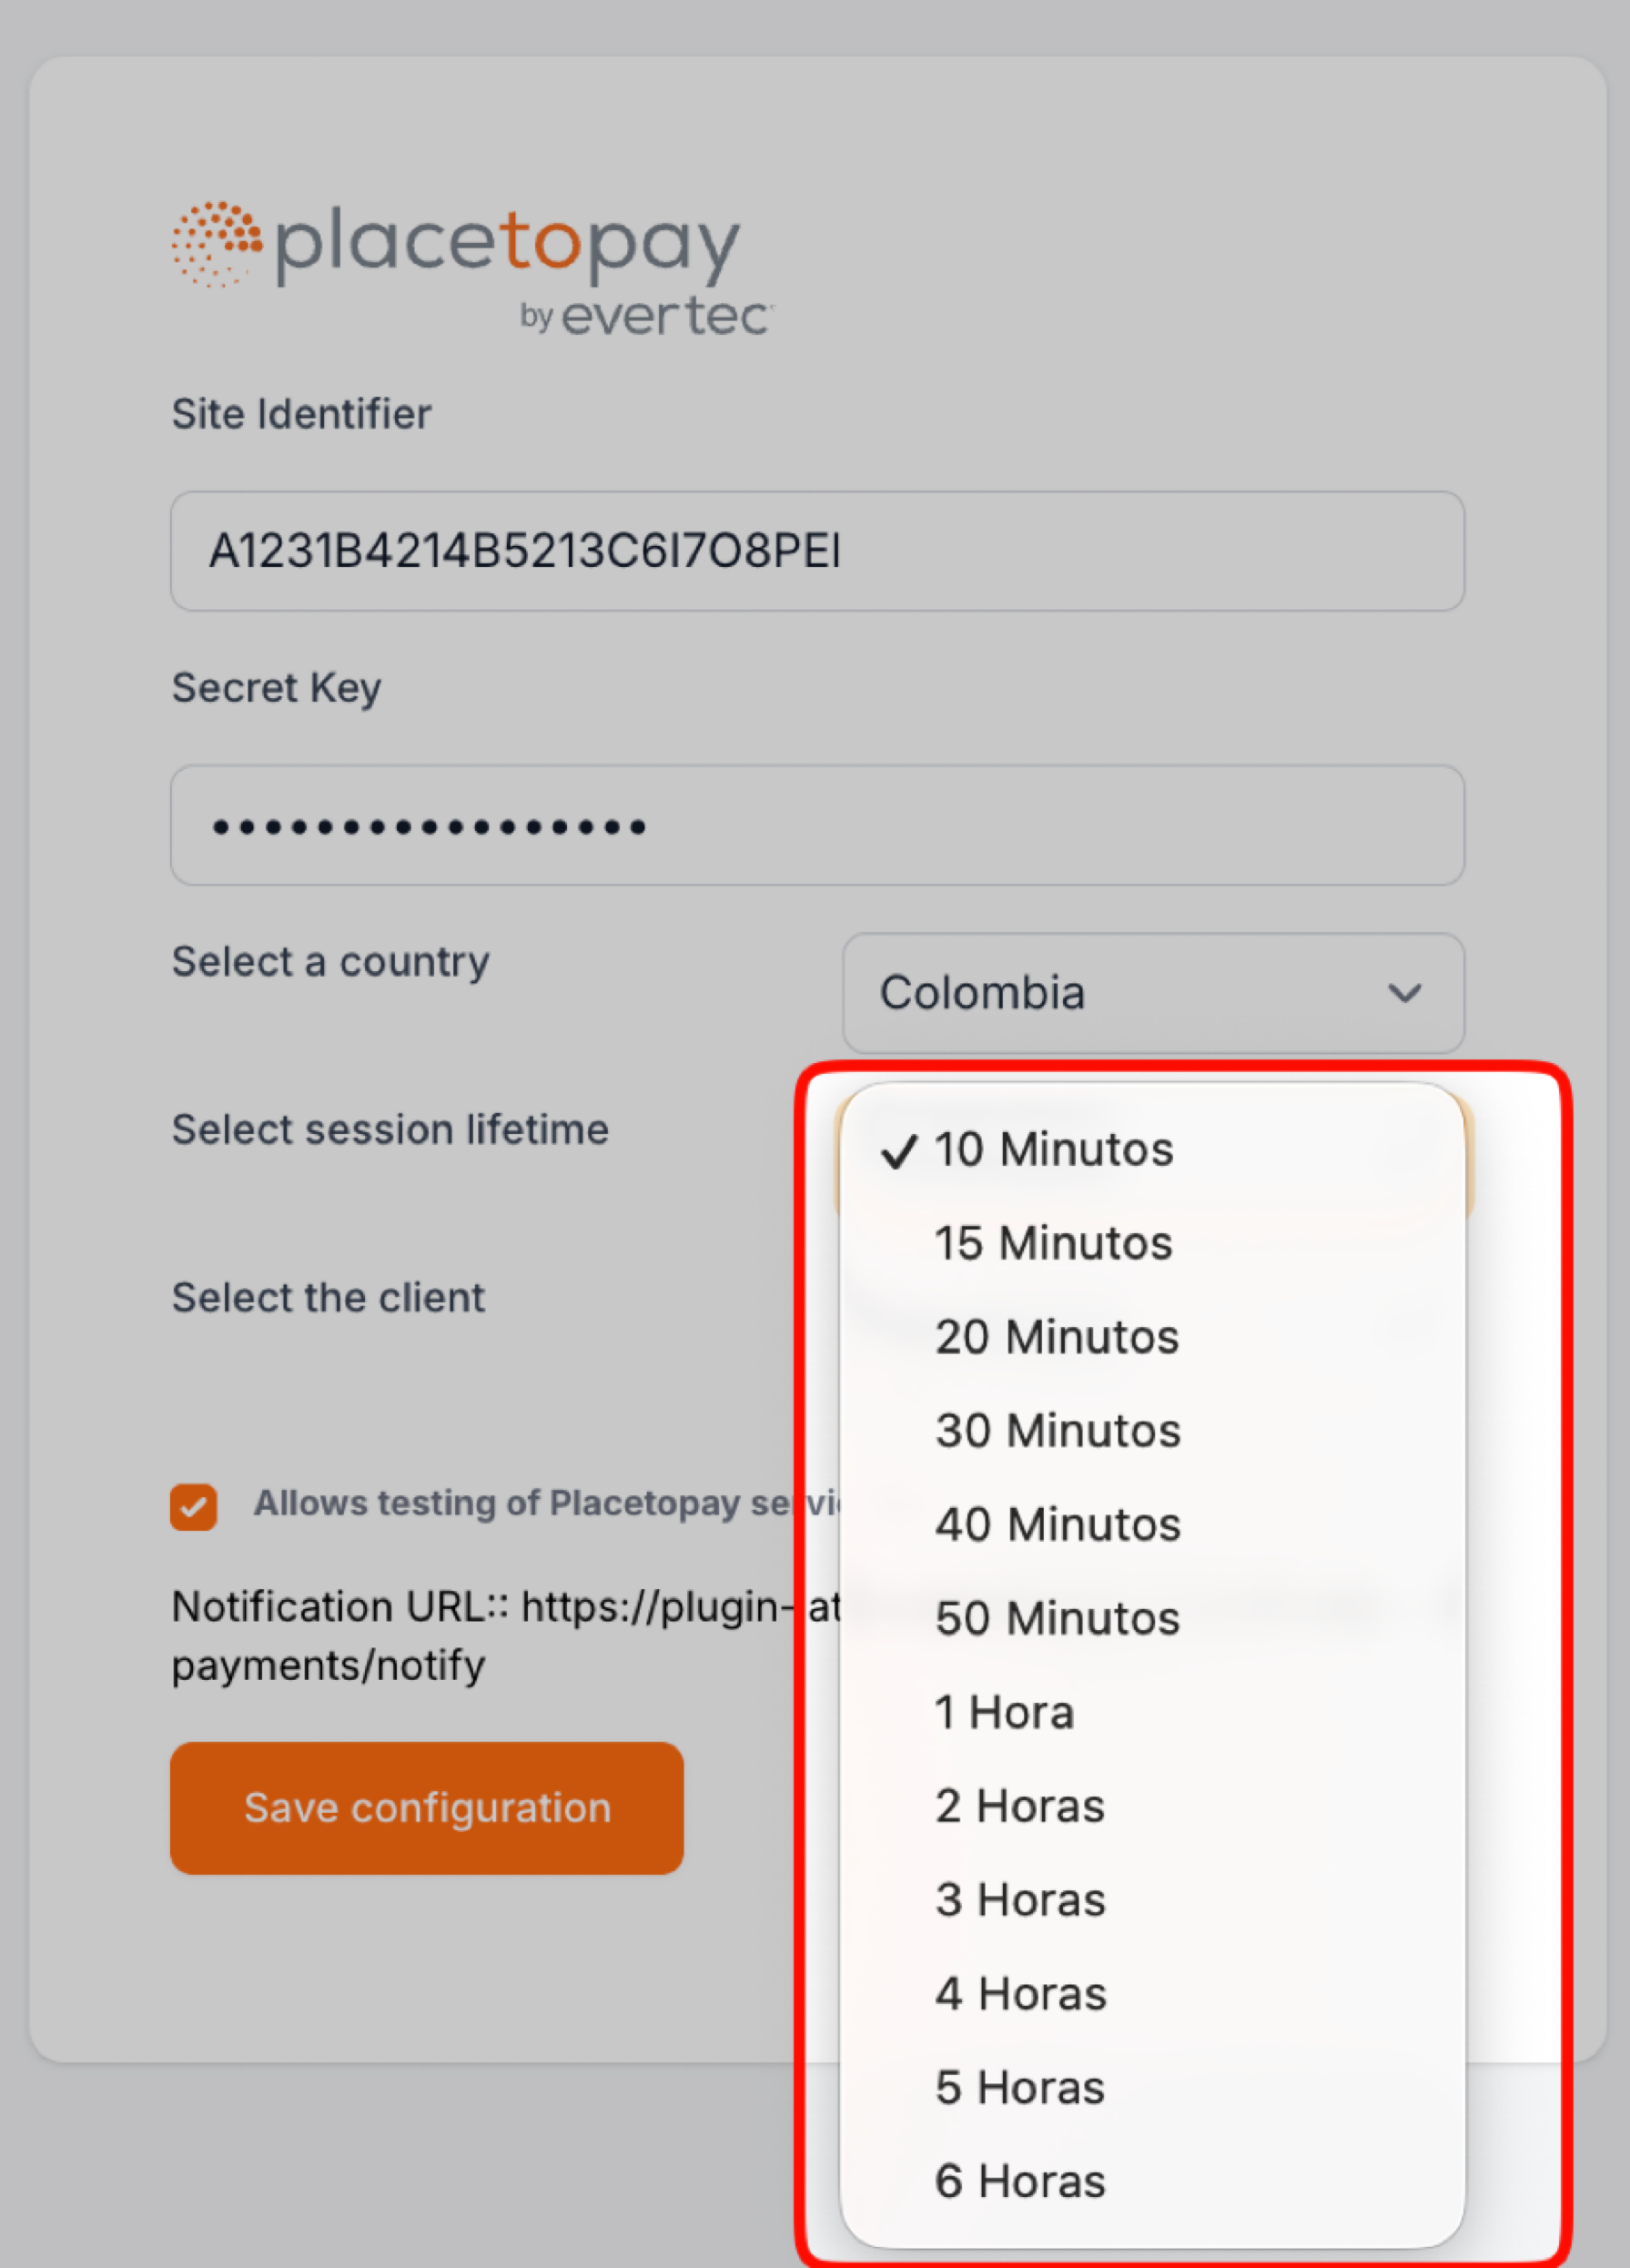
This is the time window given to the buyer to complete checkout. A period of 10–15 minutes is recommended.
This option controls the environment used by the plugin. When enabled, test environments are used. To make changes in production, disable this option.

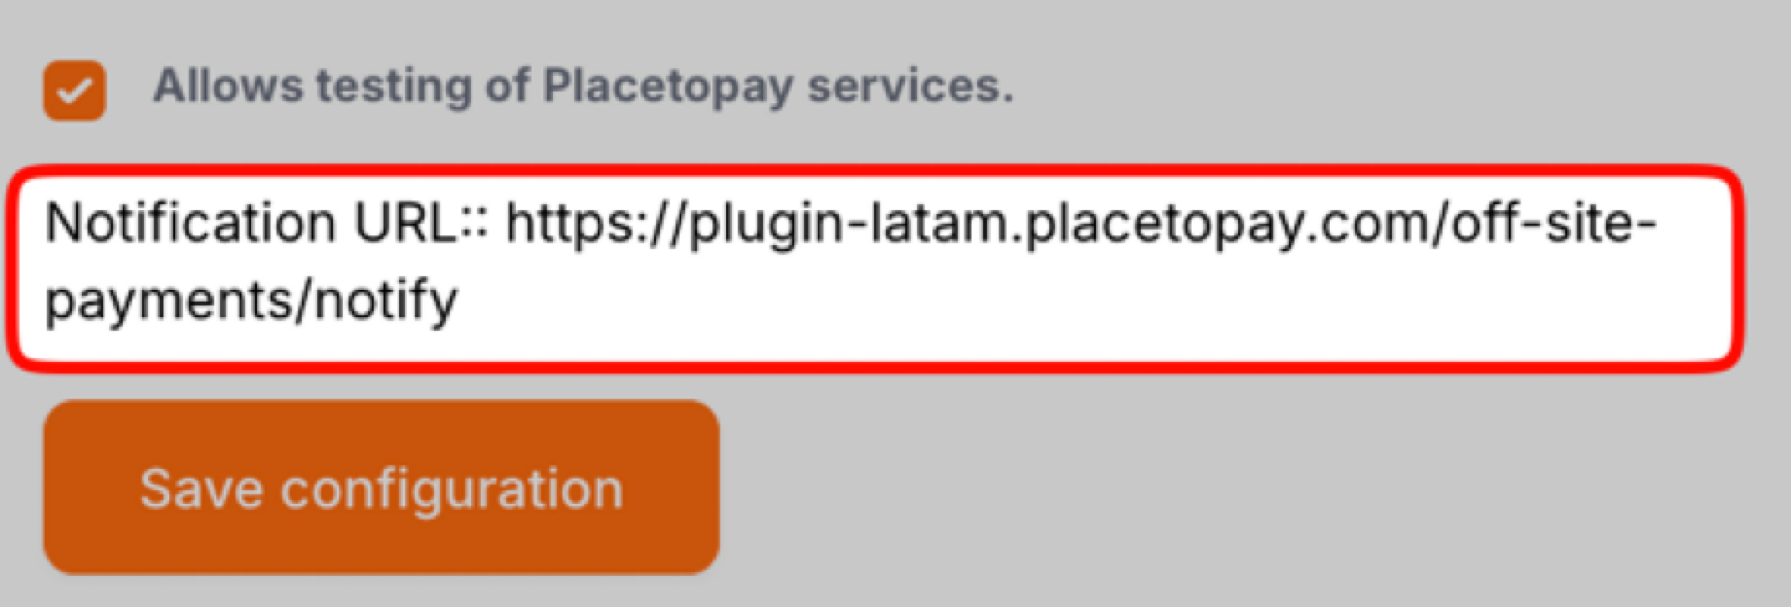
The default URL provided by the plugin is used to update transactions asynchronously. It’s important to share this URL with the payment gateway so it can be configured properly.
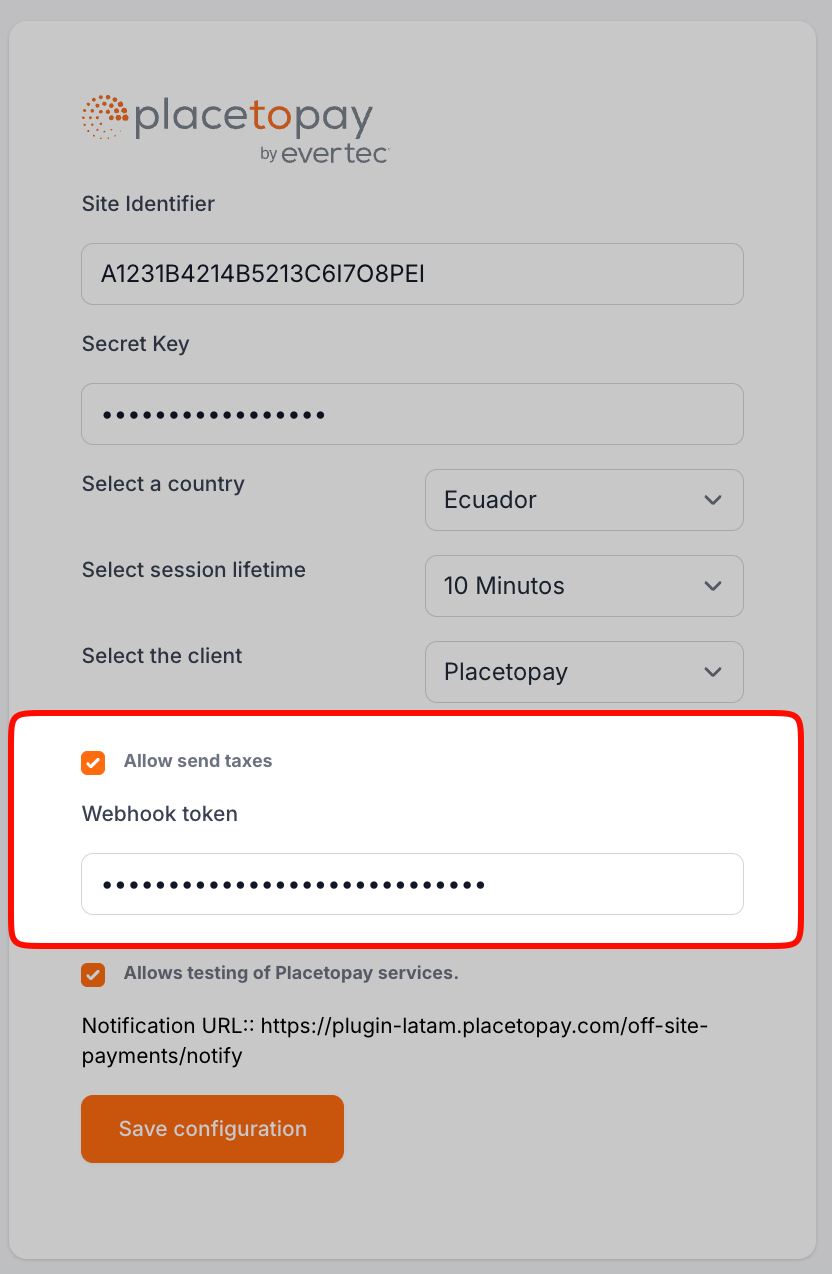
If your country is enabled for tax sending, follow these steps:
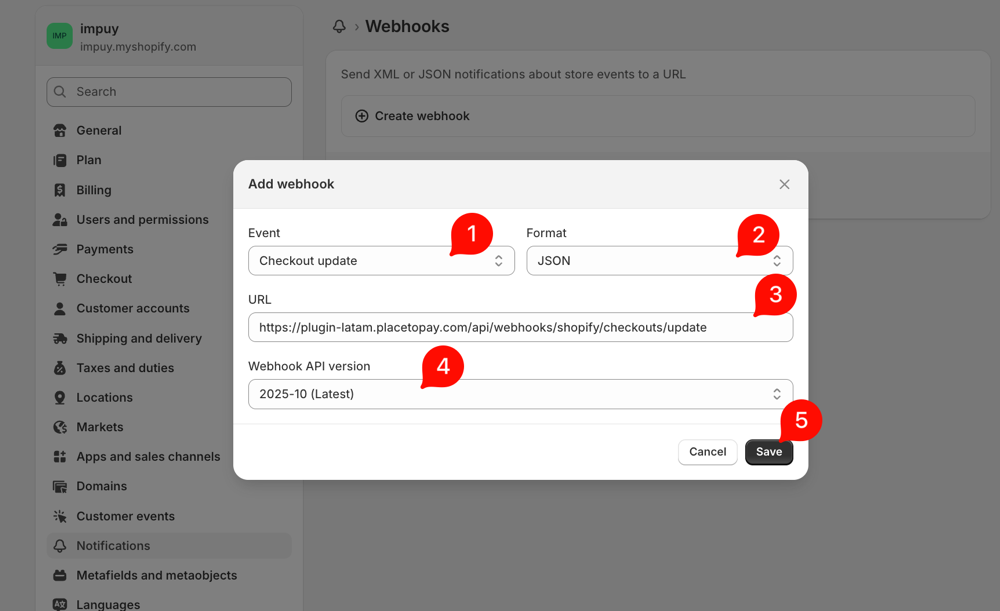
In your Shopify admin, go to Settings and add a webhook as shown.
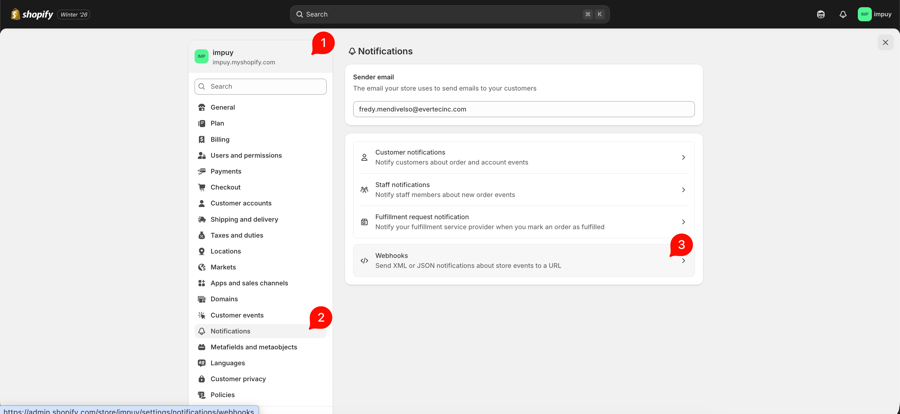
Select the values exactly as shown in the image and set the notification URL to: https://plugin-latam.placetopay.com/api/webhooks/shopify/checkouts/update
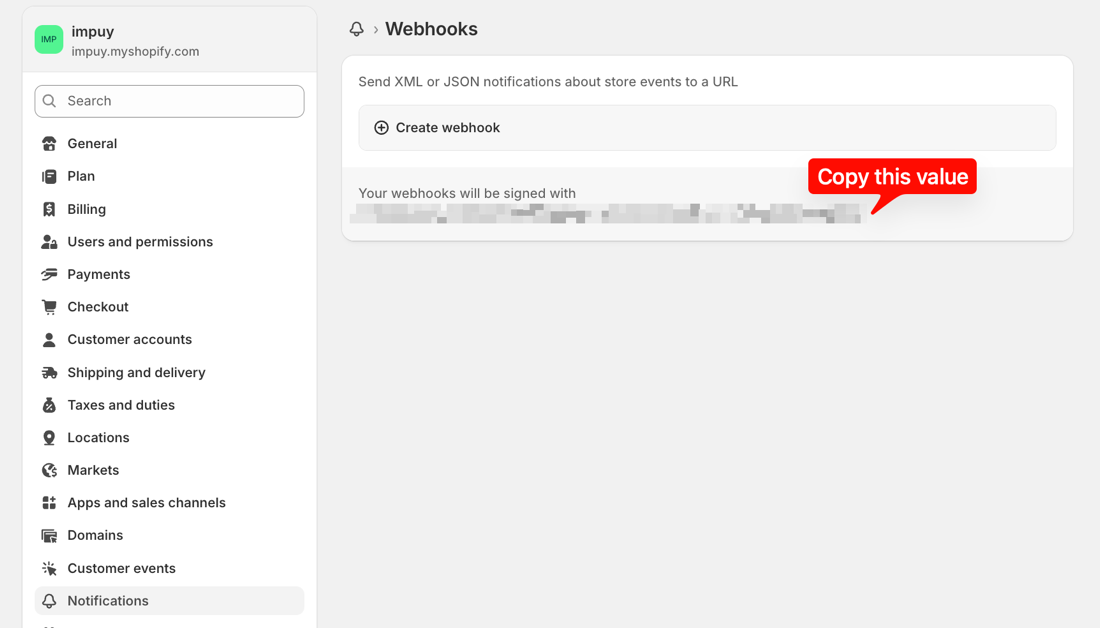
Copy the value shown next (the generated Webhook token) to use it in the plugin form.
In the plugin configuration form, enable the Send taxes option to activate tax sending and paste the copied token in the Webhook token field.
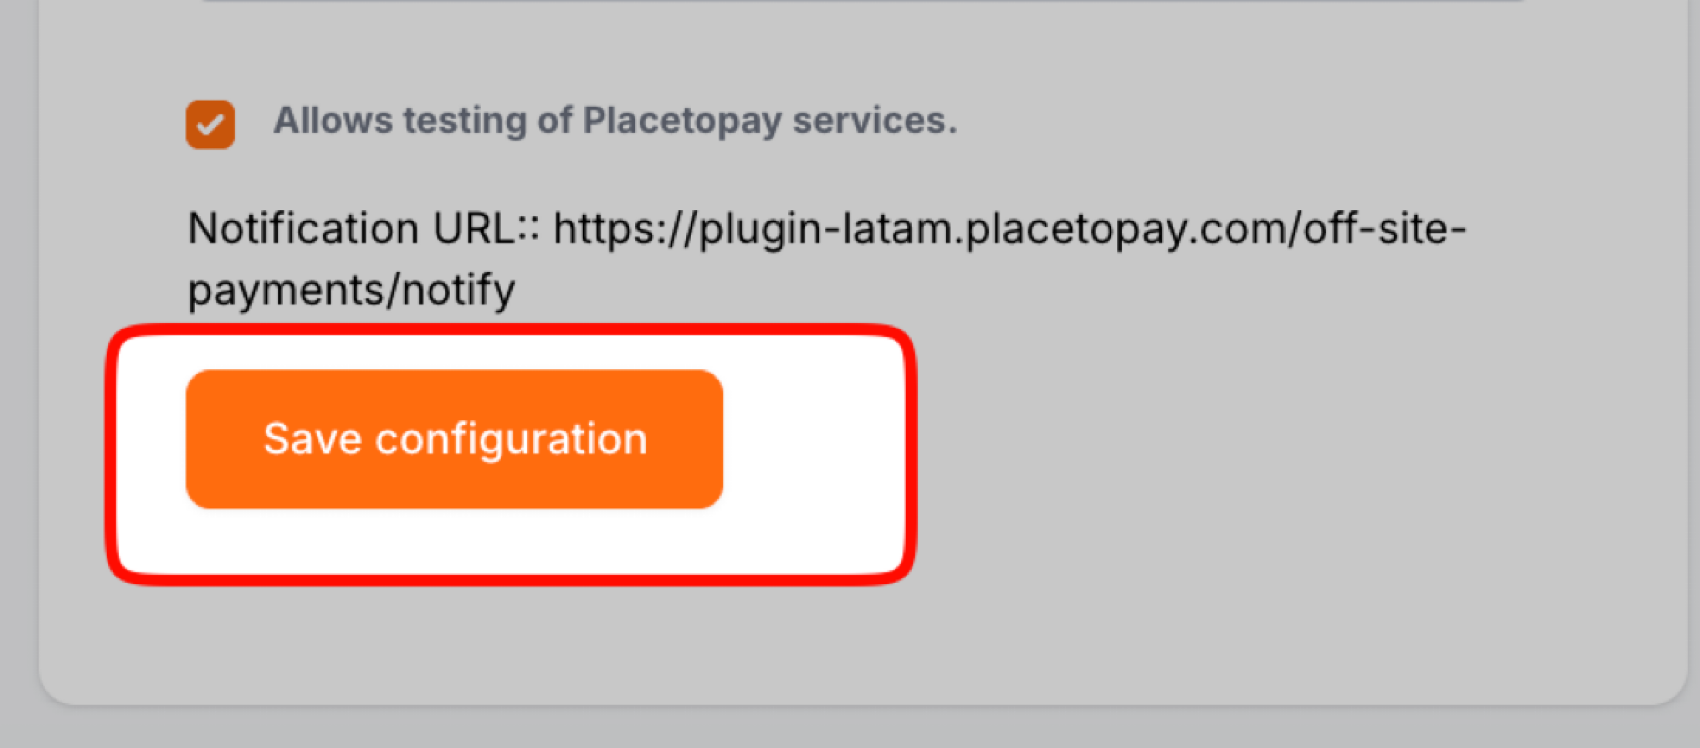
When you finish, click Save configuration to apply the changes.
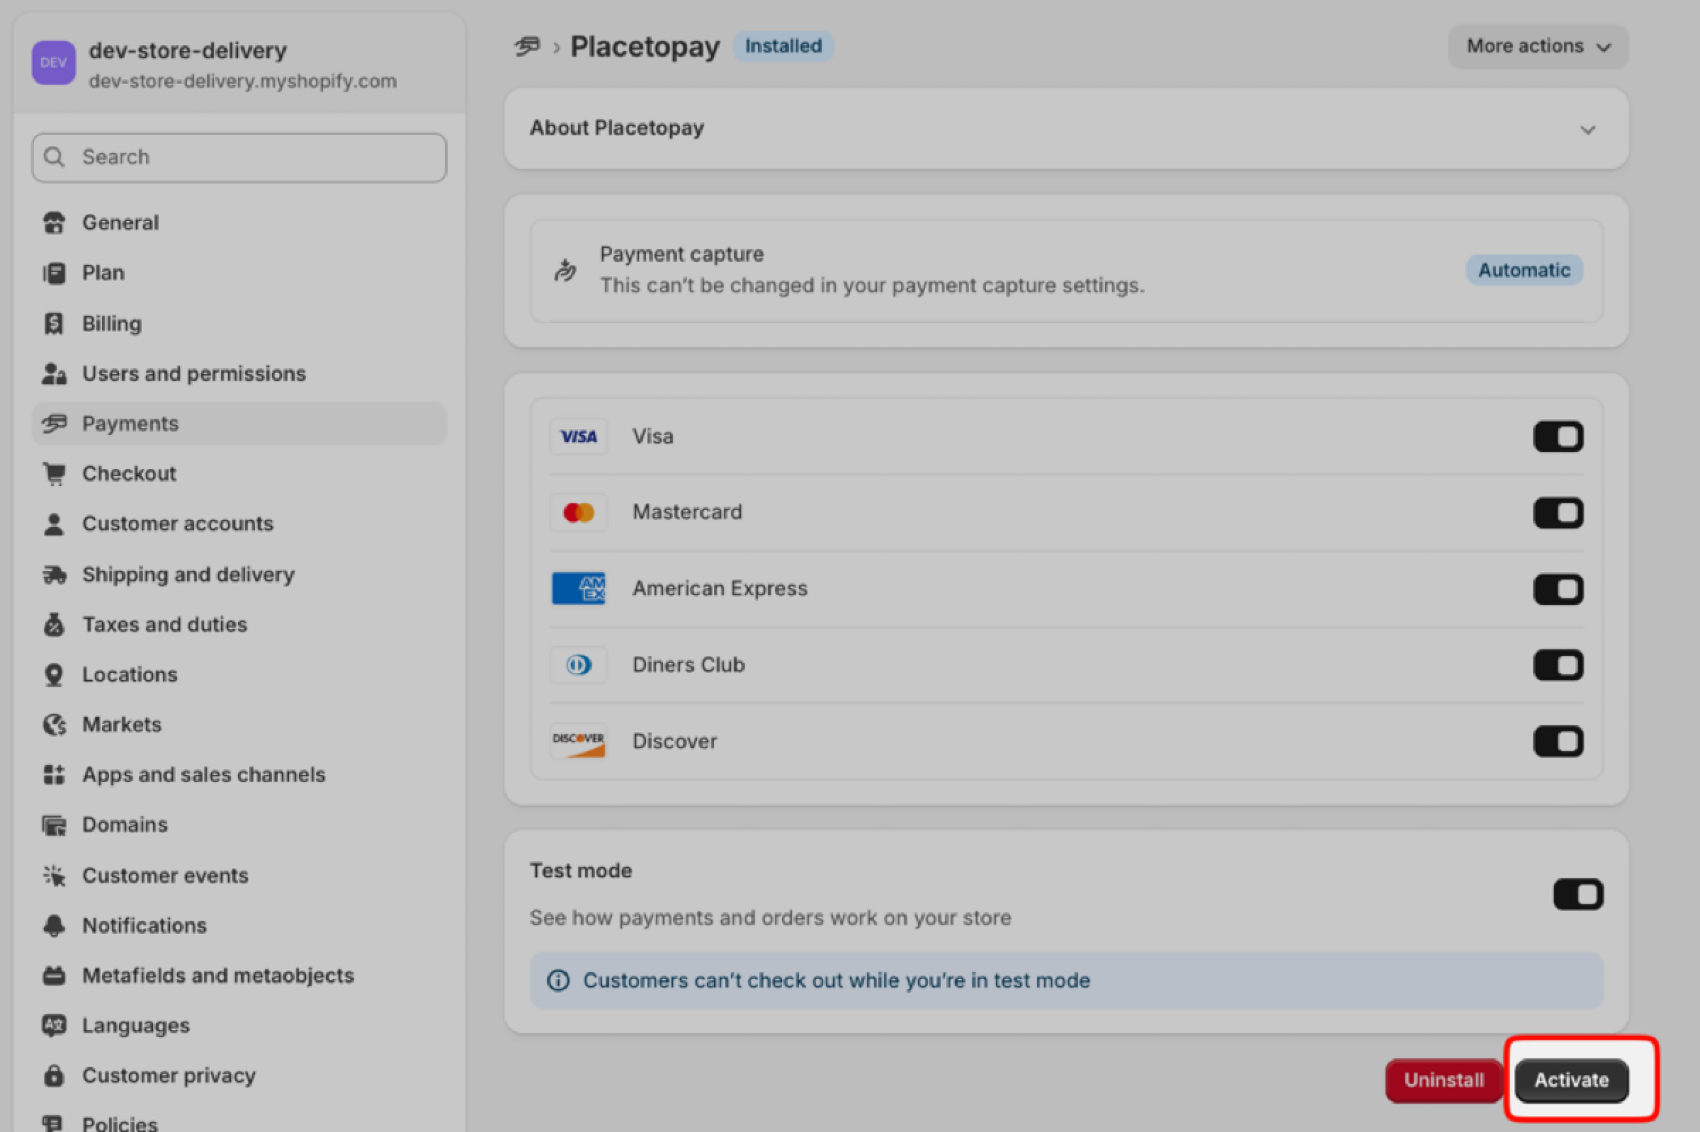
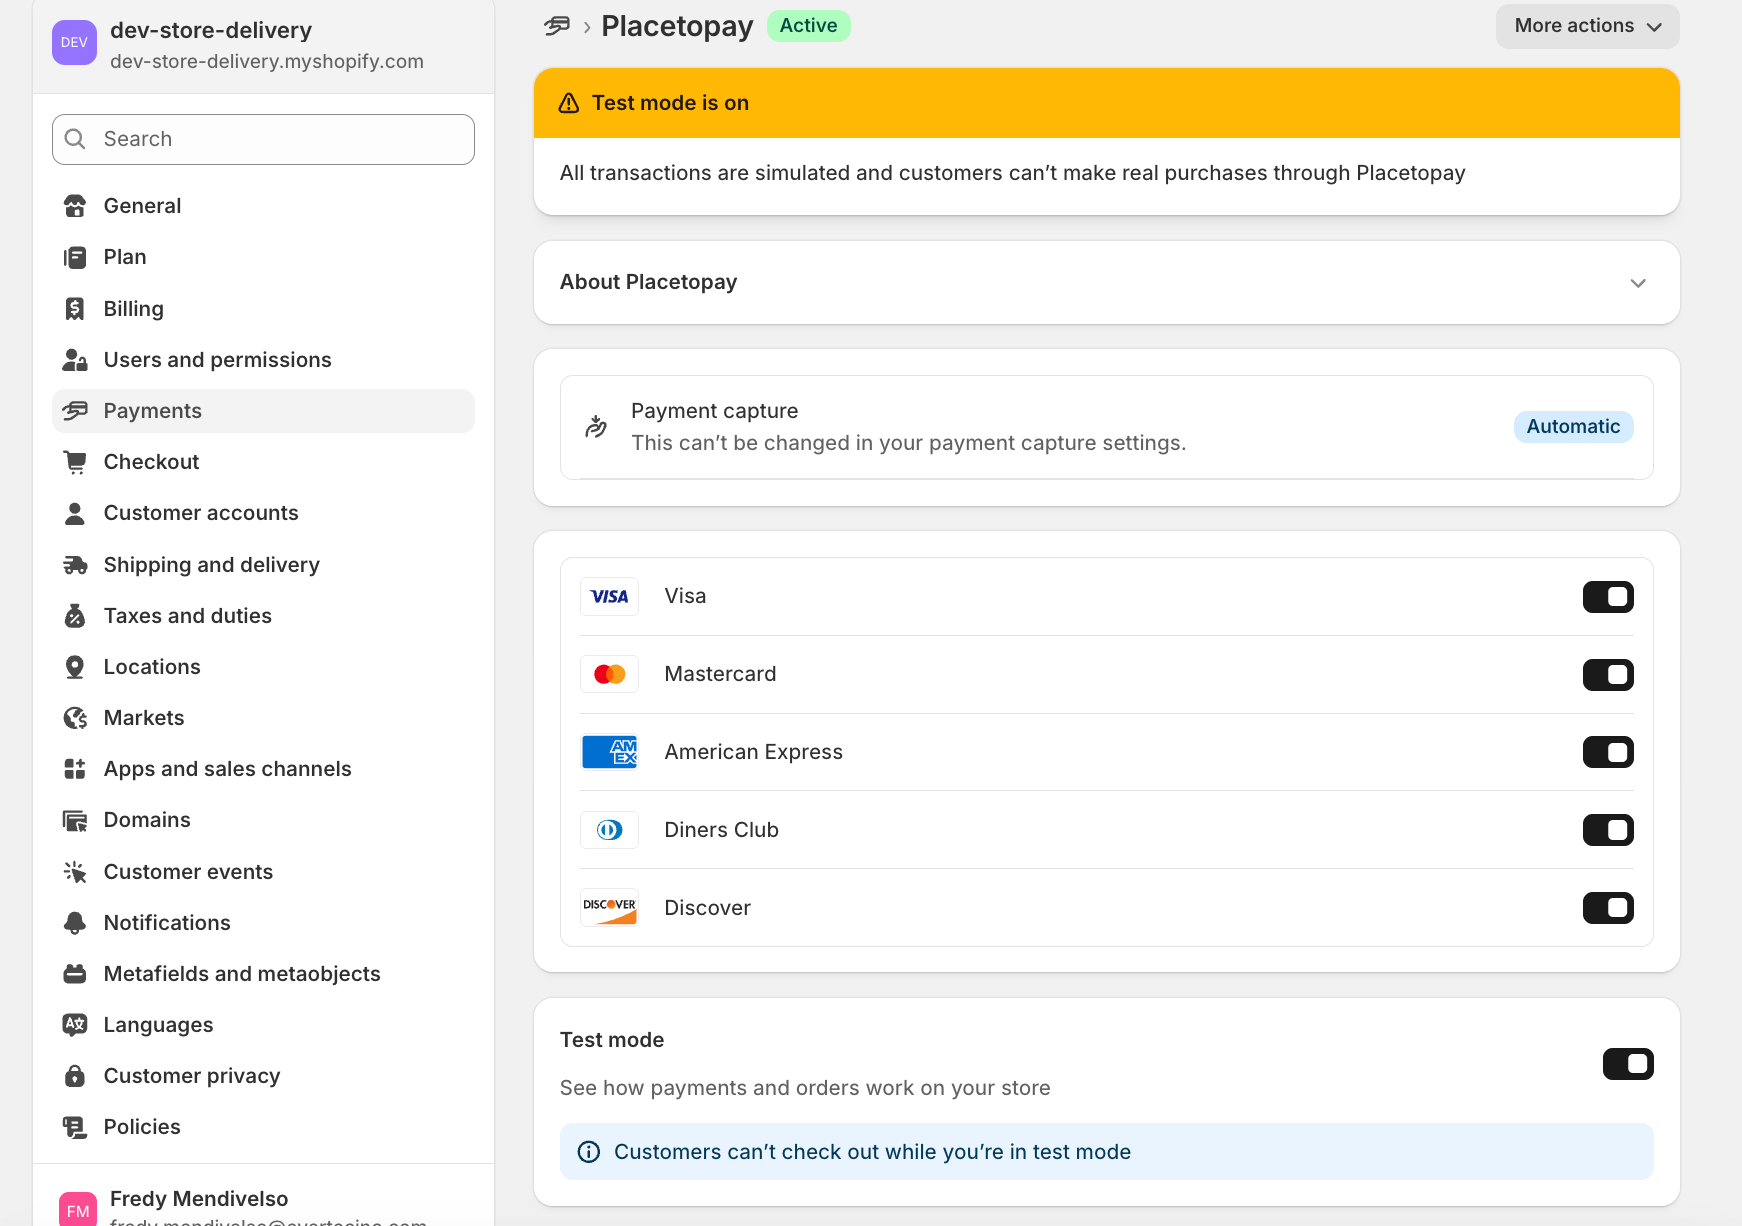
After saving the payment method, click Activate PlacetoPay to enable it.
When your customer starts the purchase flow, an order is created. Depending on the case, it can transition through the following five statuses:
See documentation
See documentation
See documentation
See documentation
See documentation
See documentation