Logo Plugins Vtex

Placetopay - Payment Gateway for Vtex

Offer global and local payment methods, compatible with your language, and get them up and running in minutes.

Vtex documentation for Placetopay

Functionalities

Characteristics
Pre-filling buyer information
Partial payments
Skip payment result on placetopay
Lightbox
Customize payment image
Brand management
Allow/Disallow payments with pending orders
Set return page after payment (default, my orders)
Set payment expiration time
Payments by API
Pre-authorization type transactions
Enable/Disable Kount (Anti-fraud service)
Enable/Disable 3DS
Enable/Disable OTP service
Enable/Disable deferred payments (credit selection)

Accepts Placetopay and Vtex payments

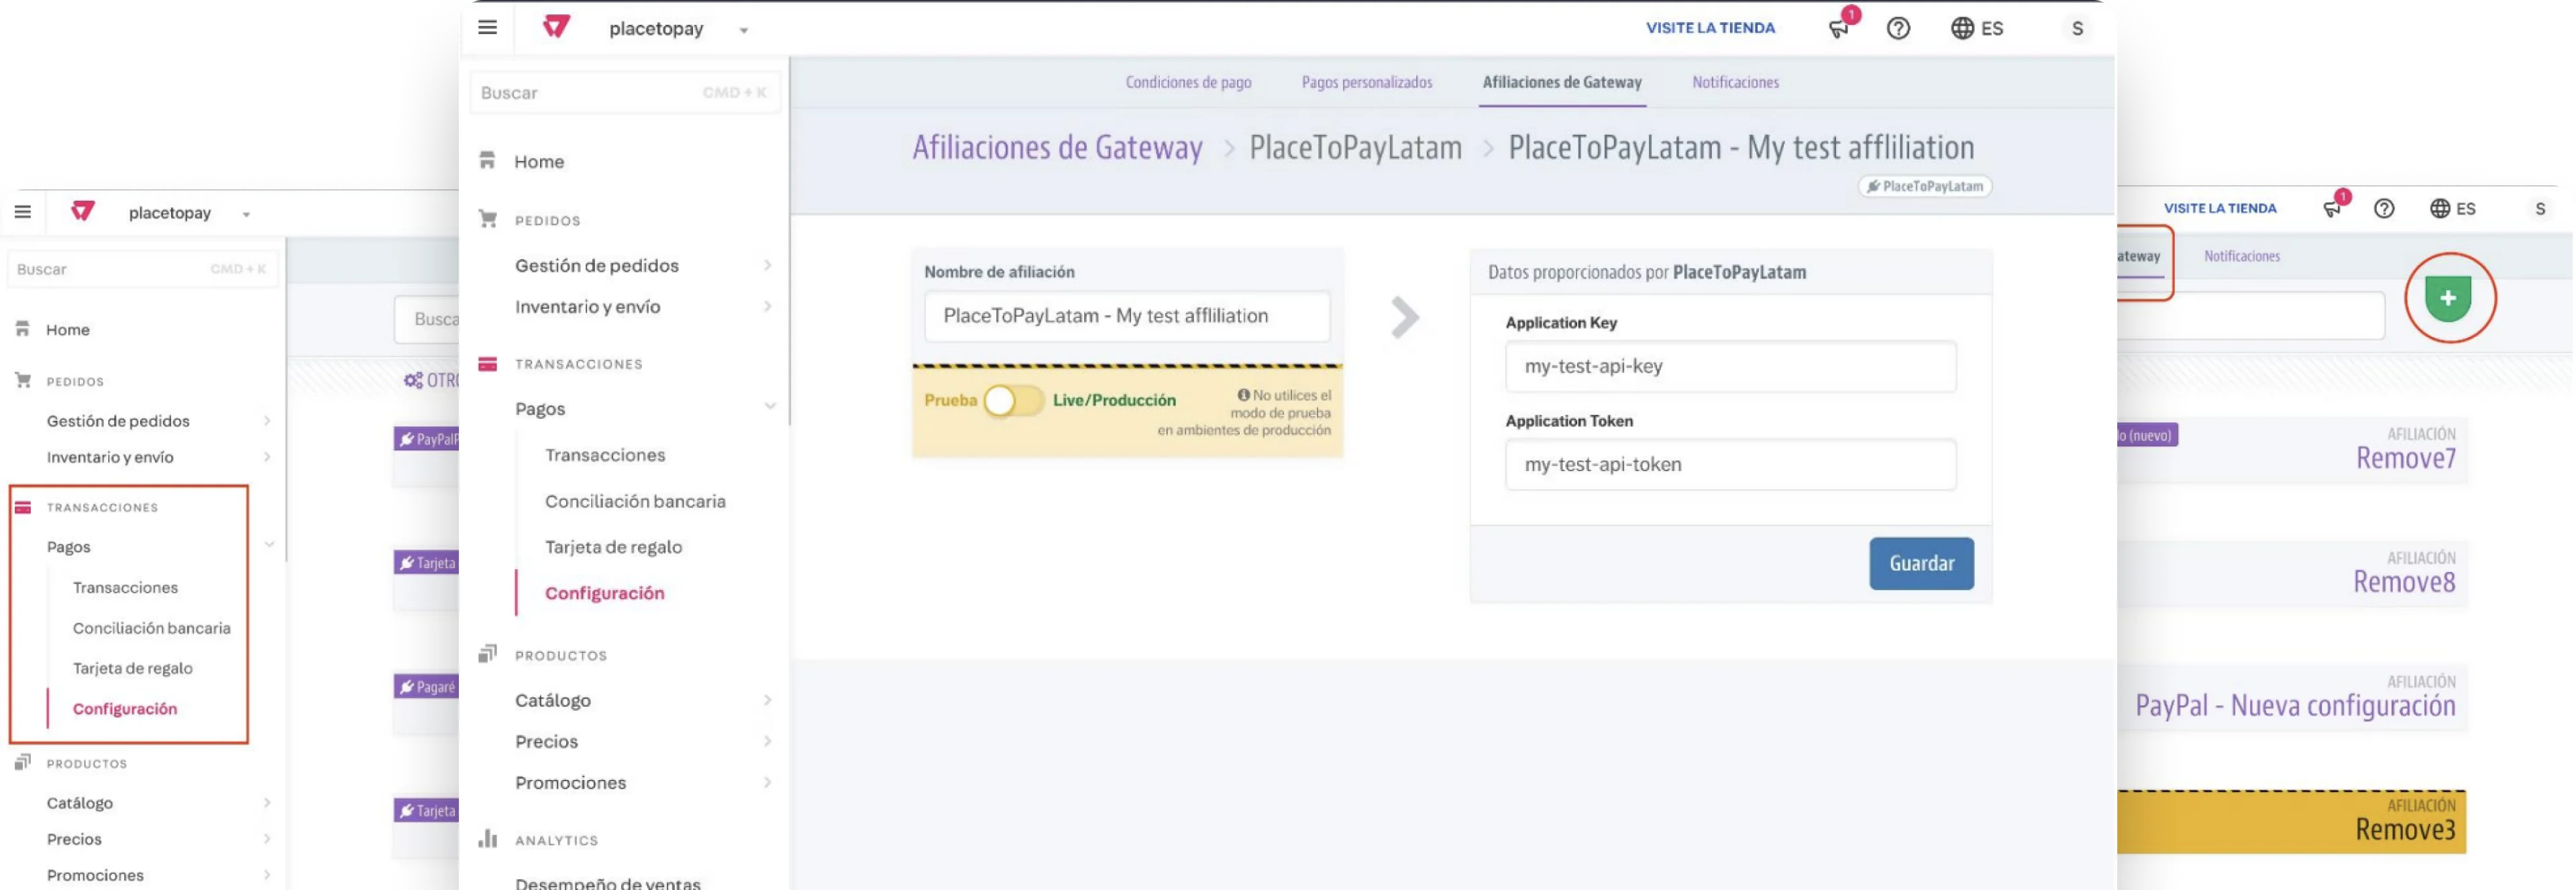
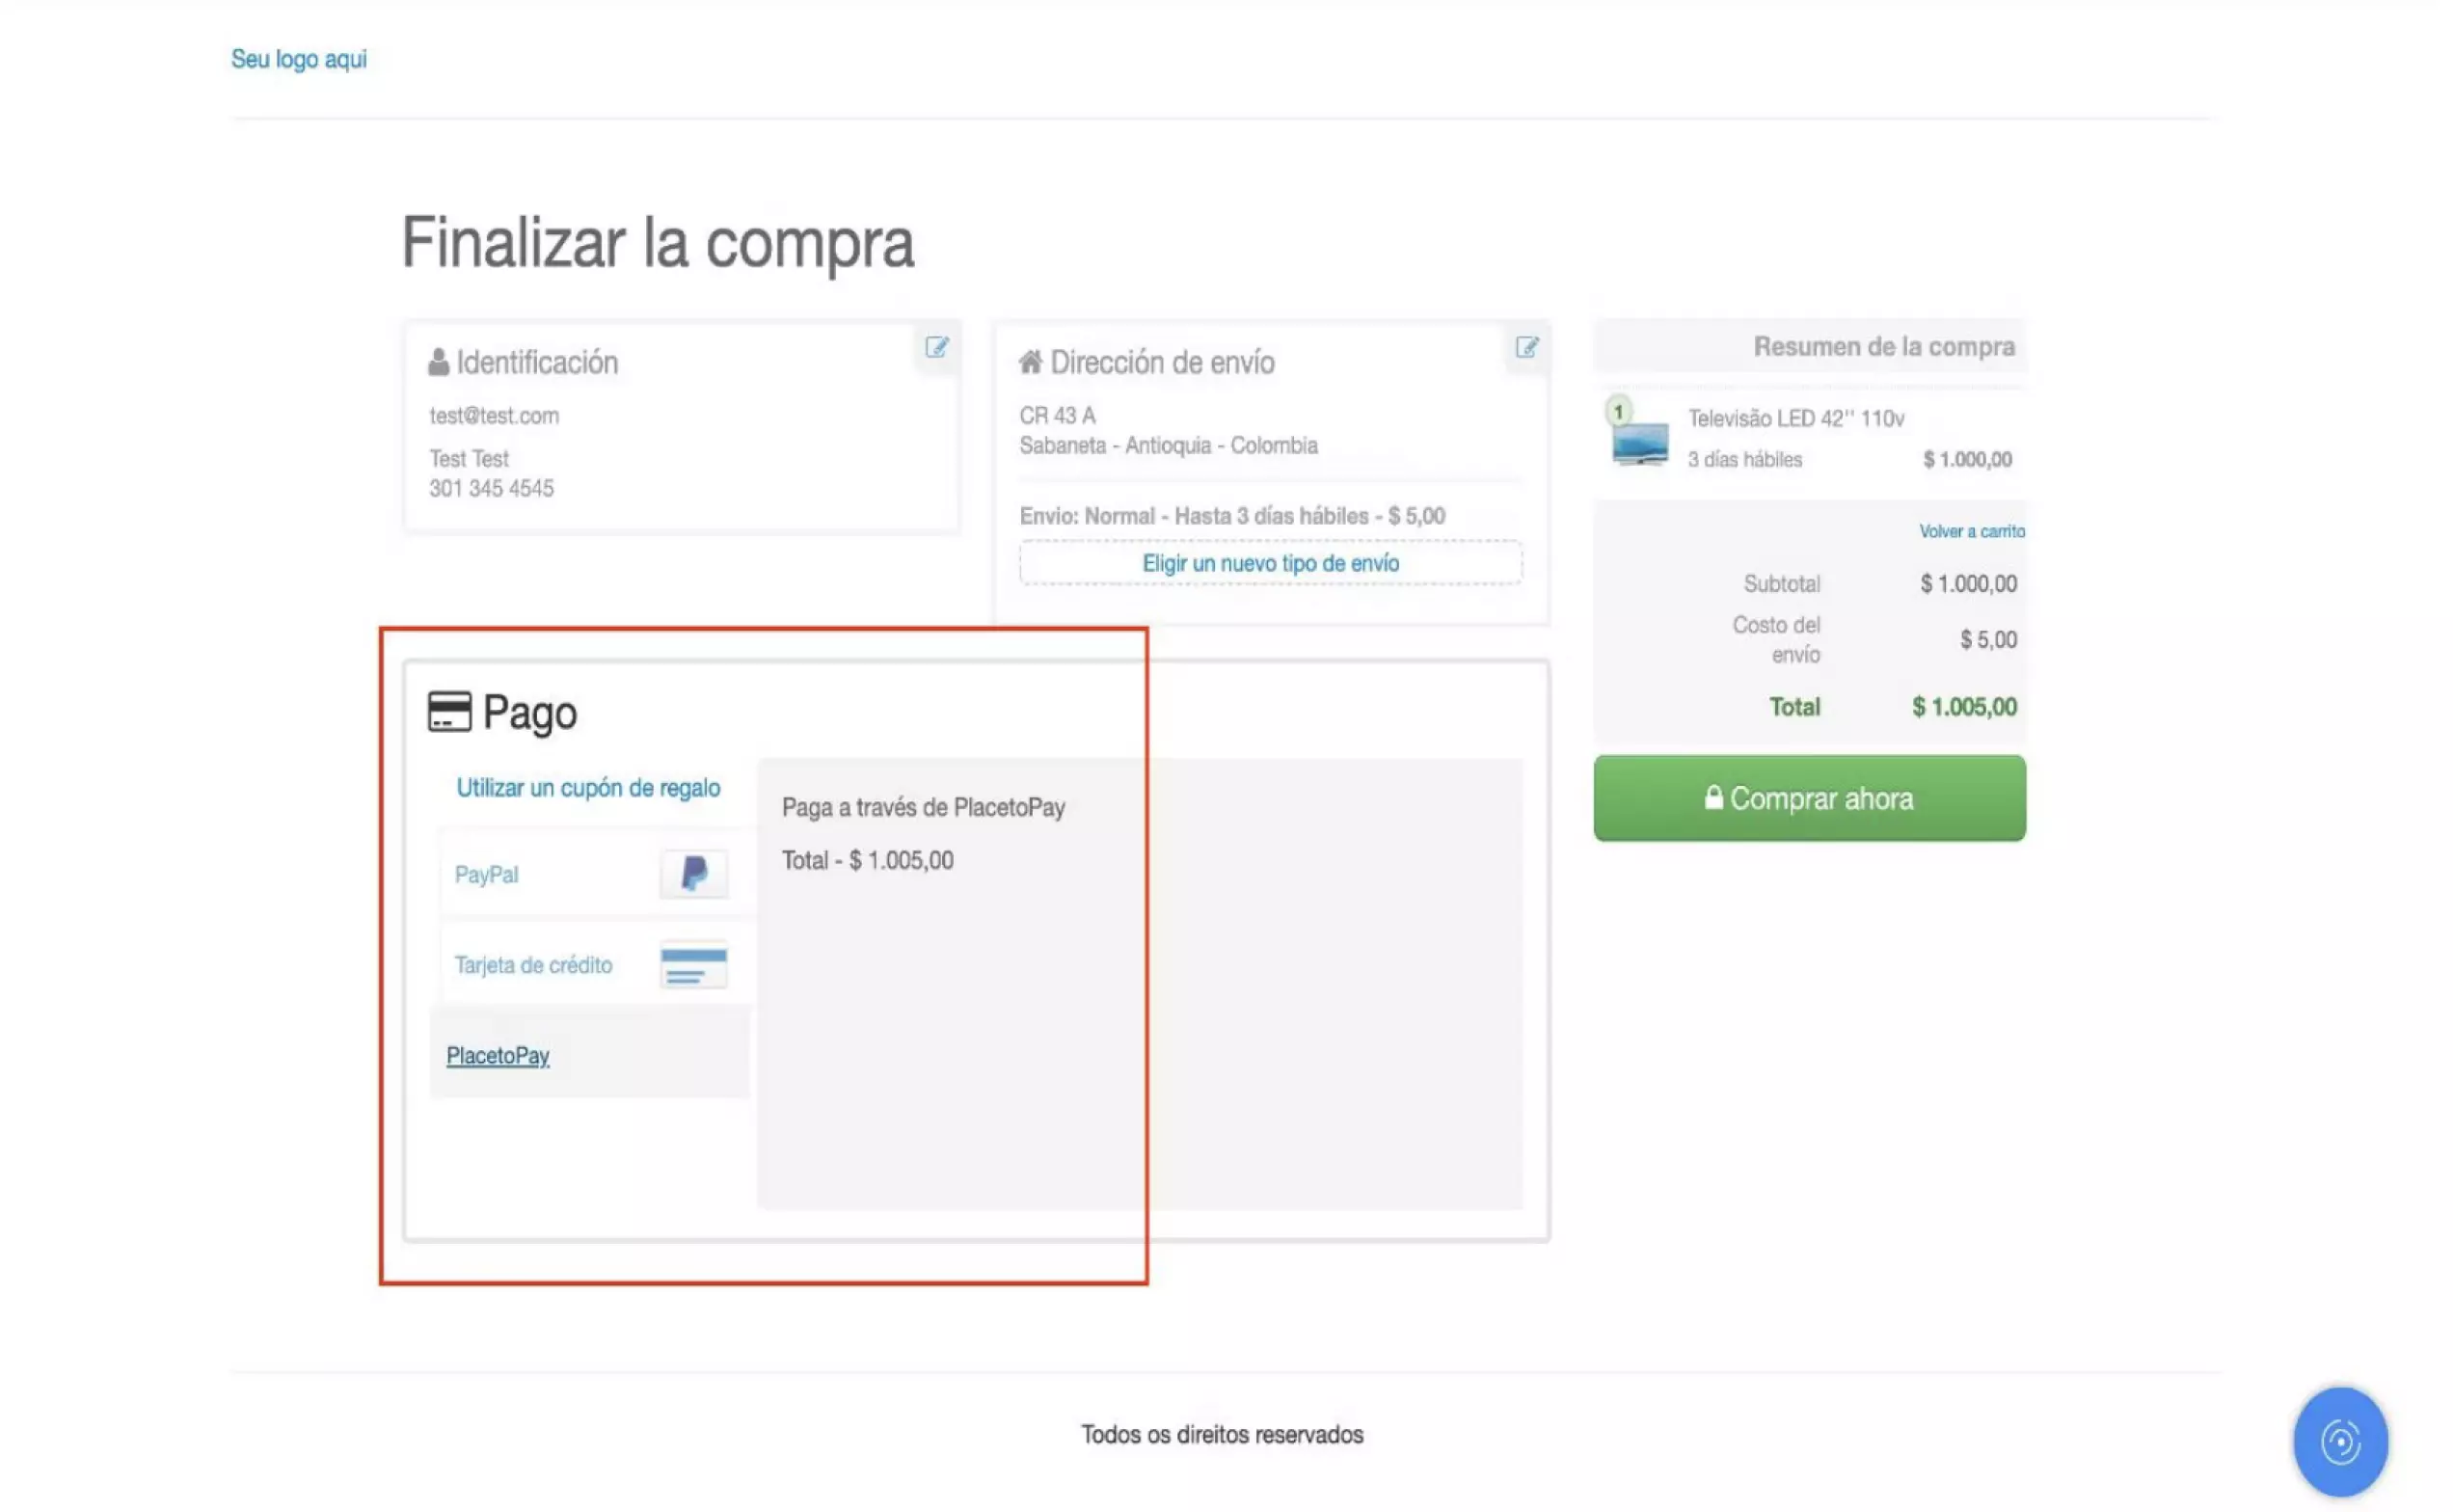
In this guide, the installation of the Placetopay plugin for Jumpseller will be explained step by step.

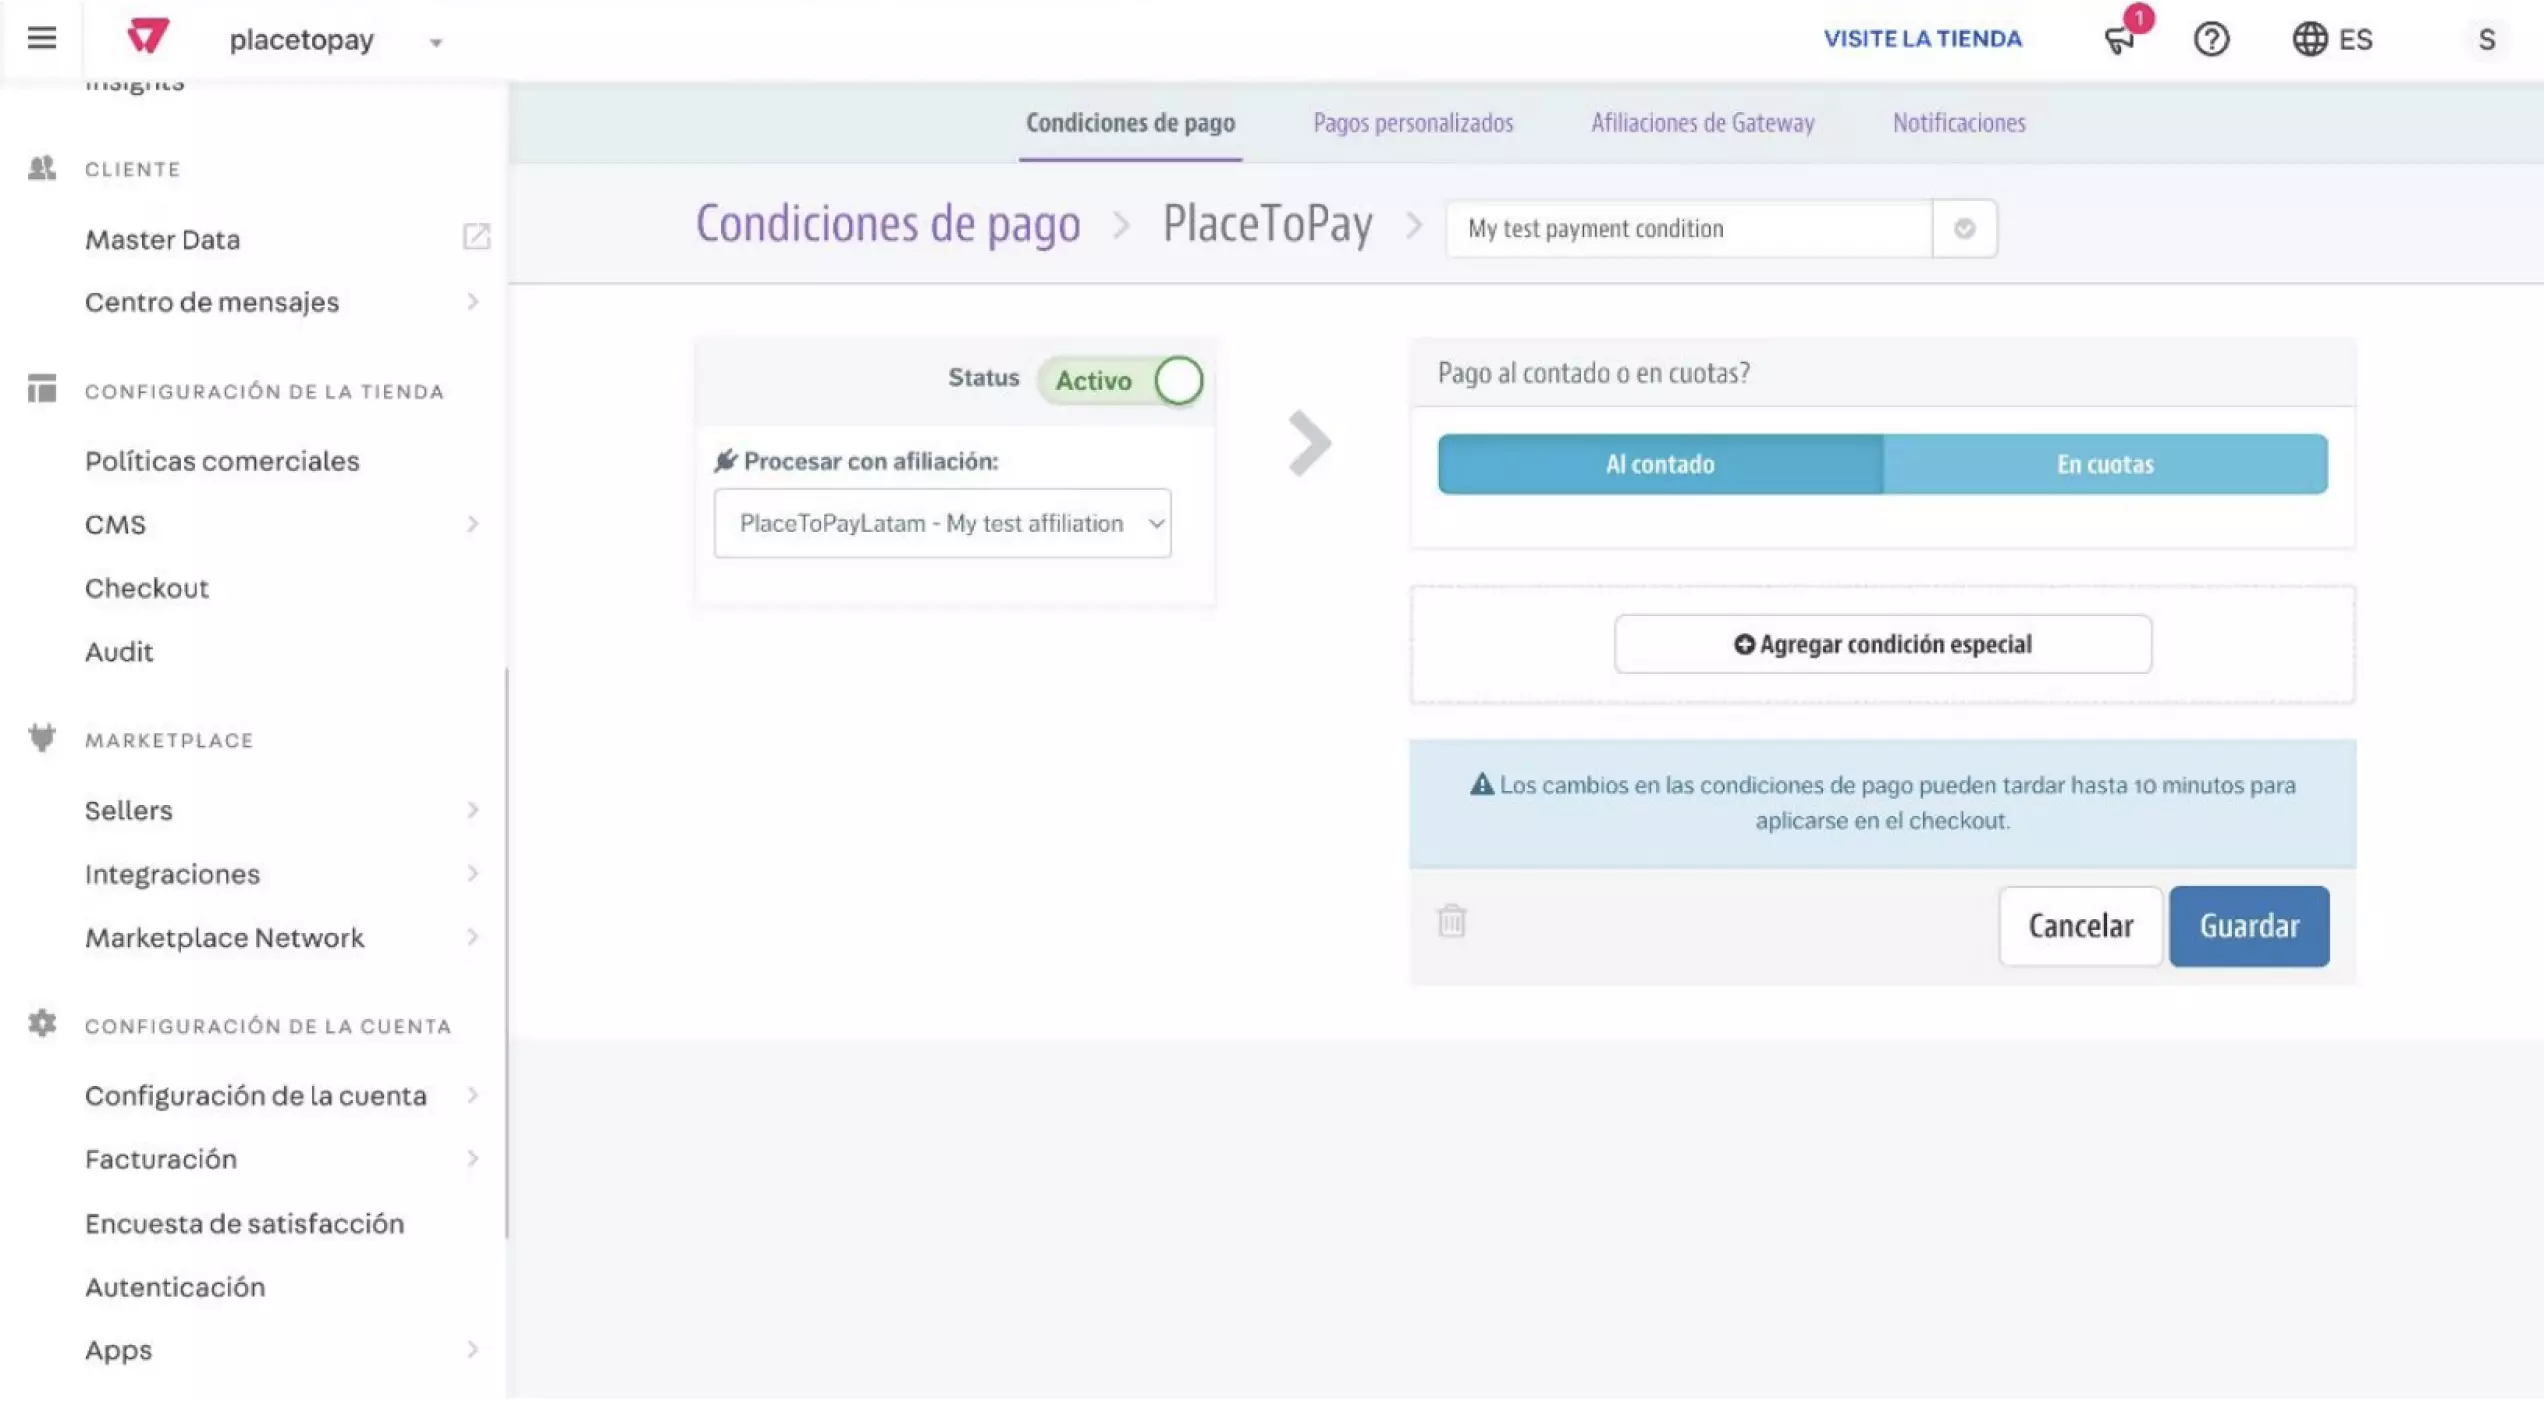
Each configuration parameter described in this guide will be performed in a test environment in order to illustrate its configuration in detail.

  1. To use Placetopay, you must have an active account.
    • If you don’t have one yet, contact us
    • For more information, please do not hesitate to contact our sales team.

Please follow the steps below:

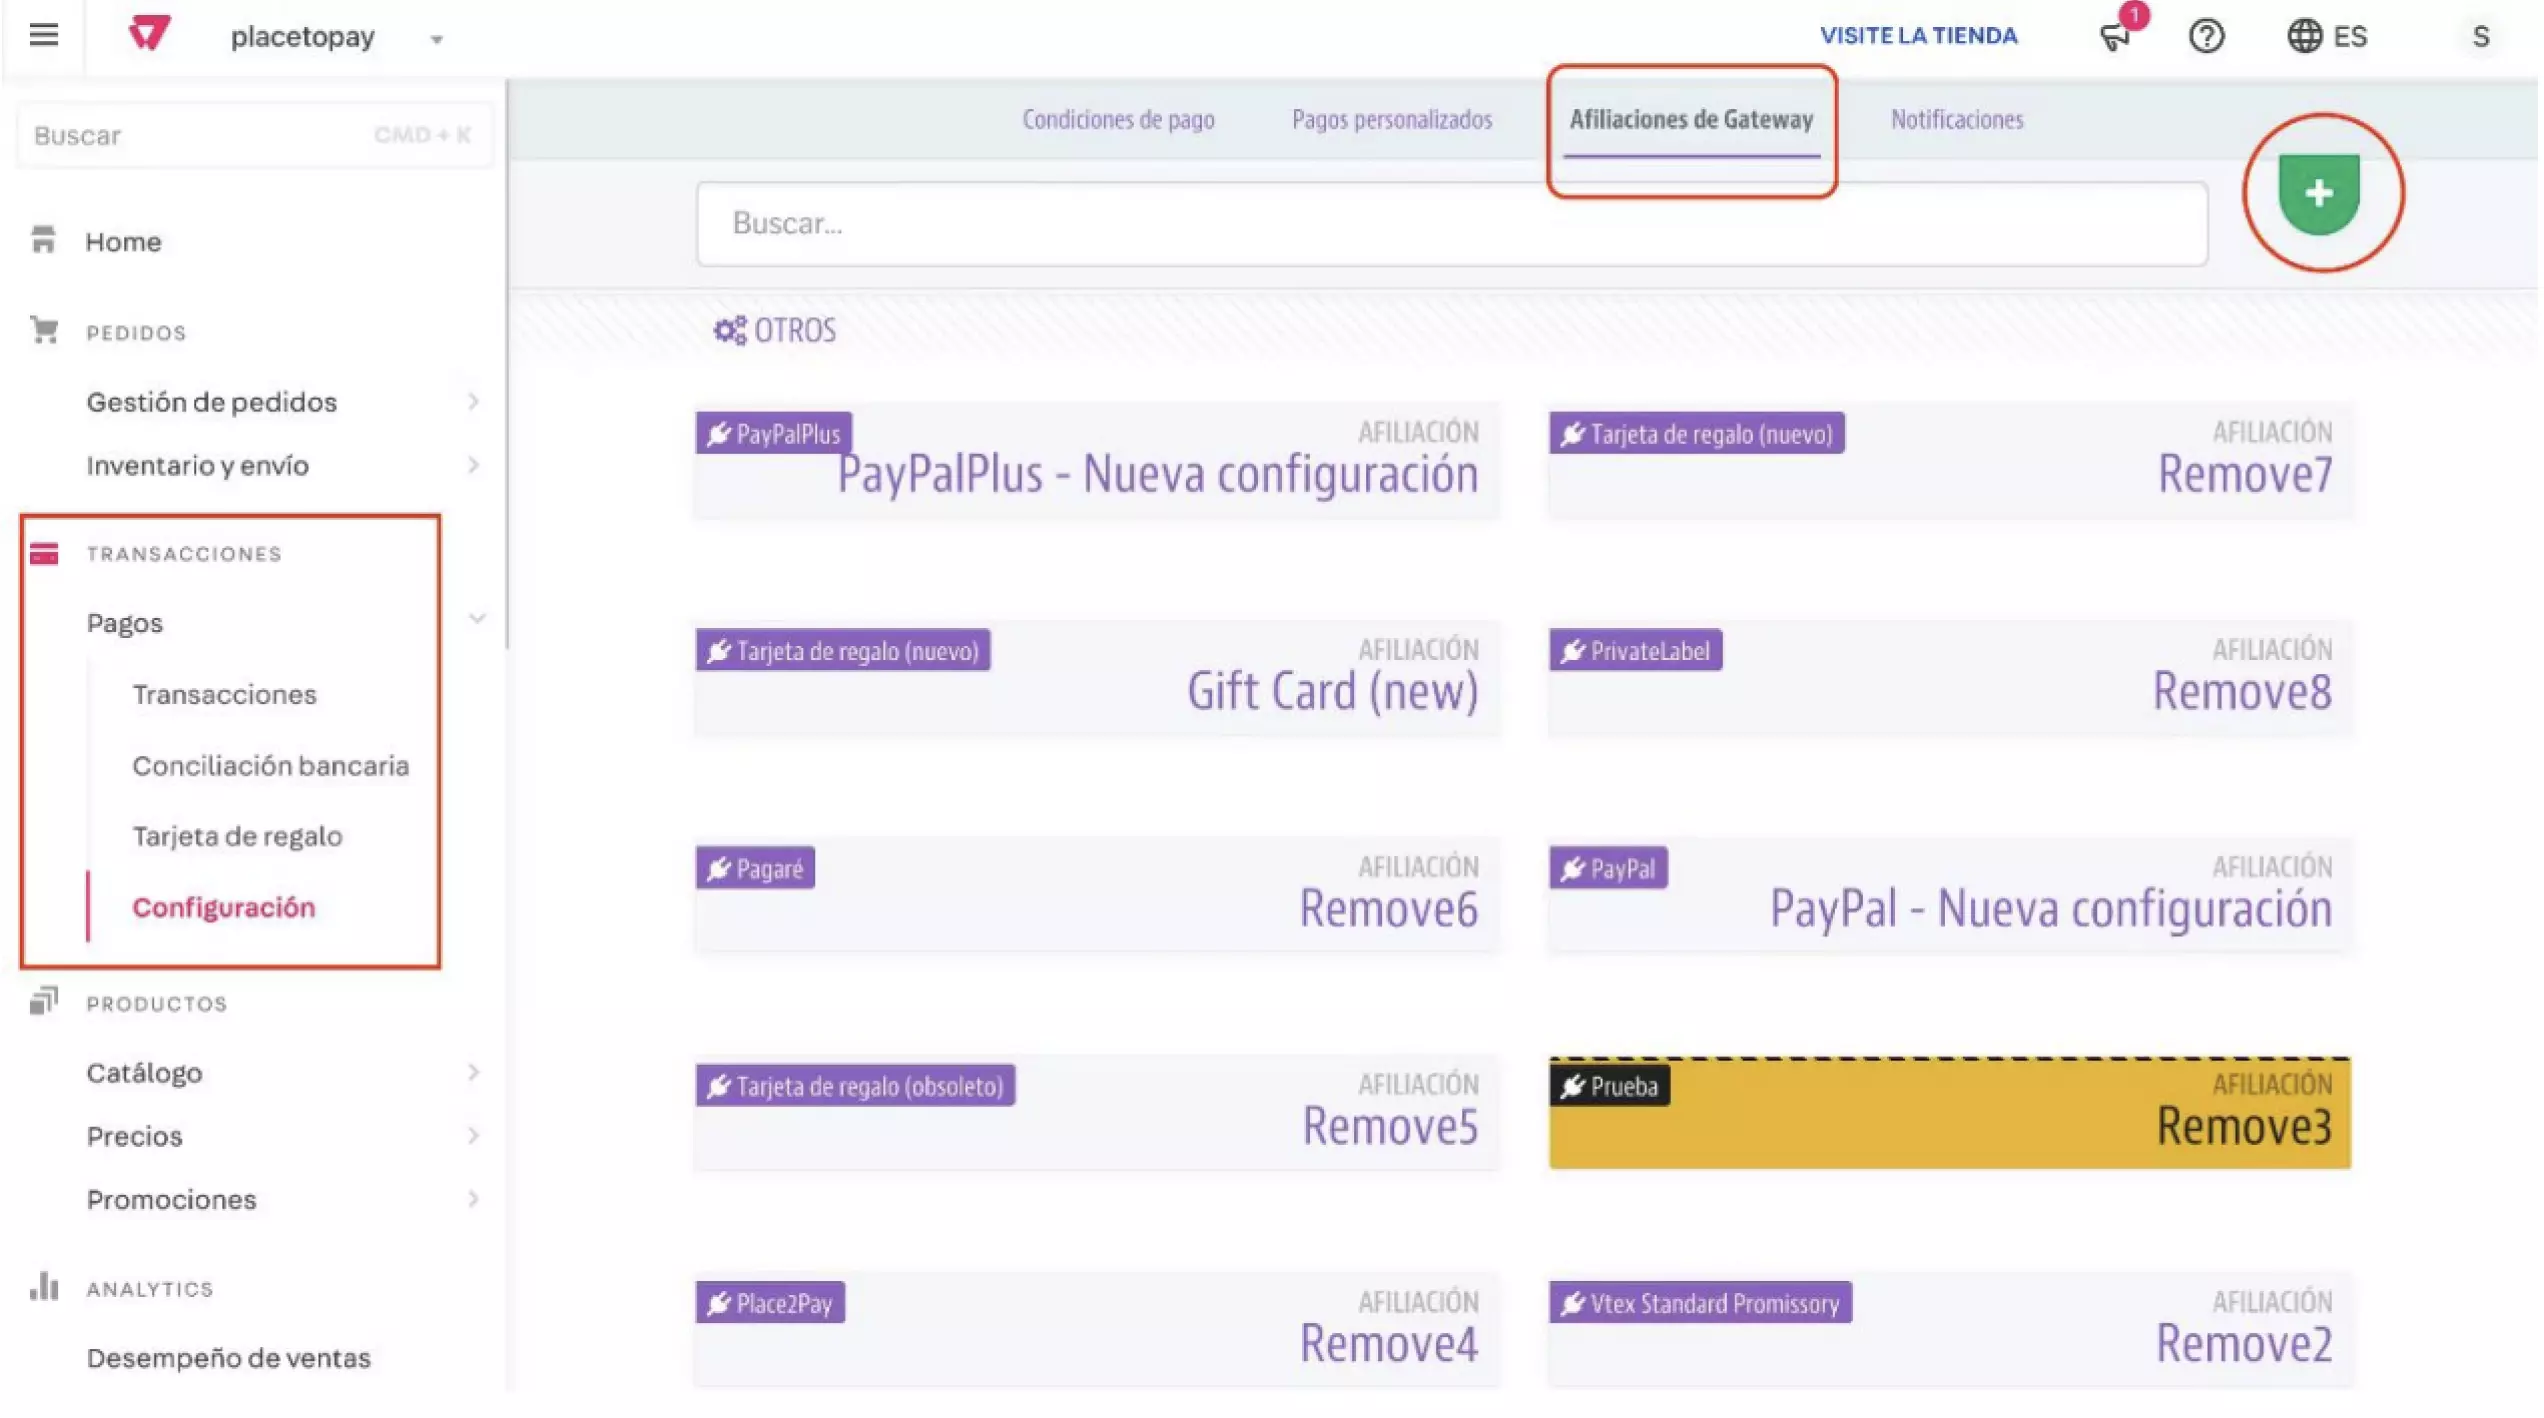
Login to the store administration panel in Vtex.

  1. In the left panel Transactions / Payments / Settings, then in the top menu locate and click on Gateway Affiliations, in this interface, locate the plus button ( + ), and search in this list for placetopay payment affiliations.
Iniciar sesión Vtex

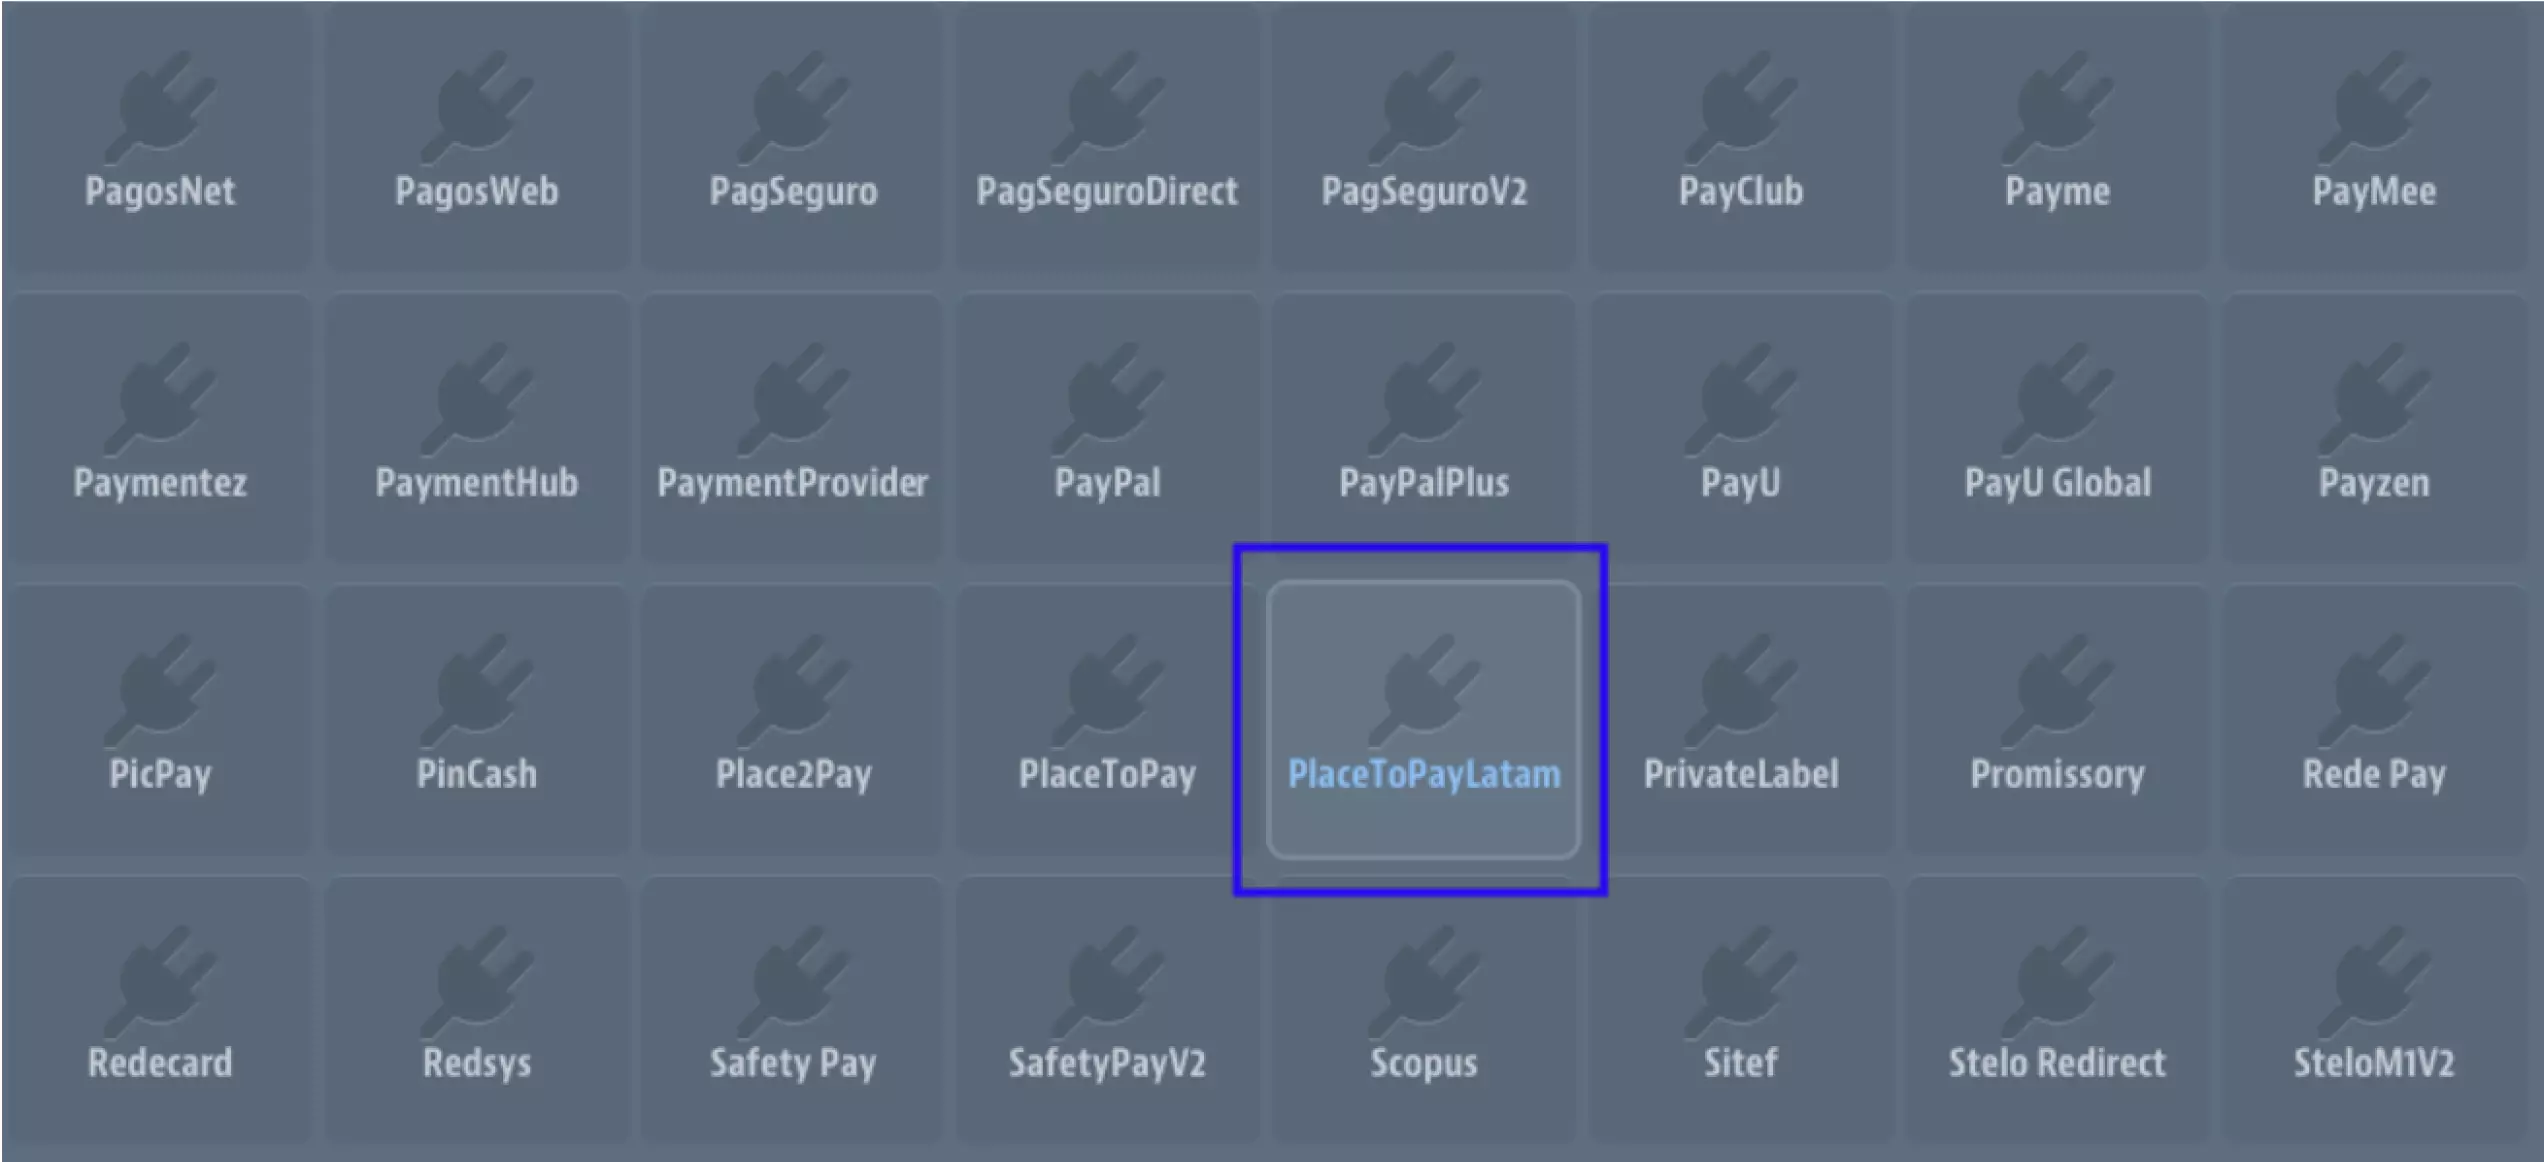
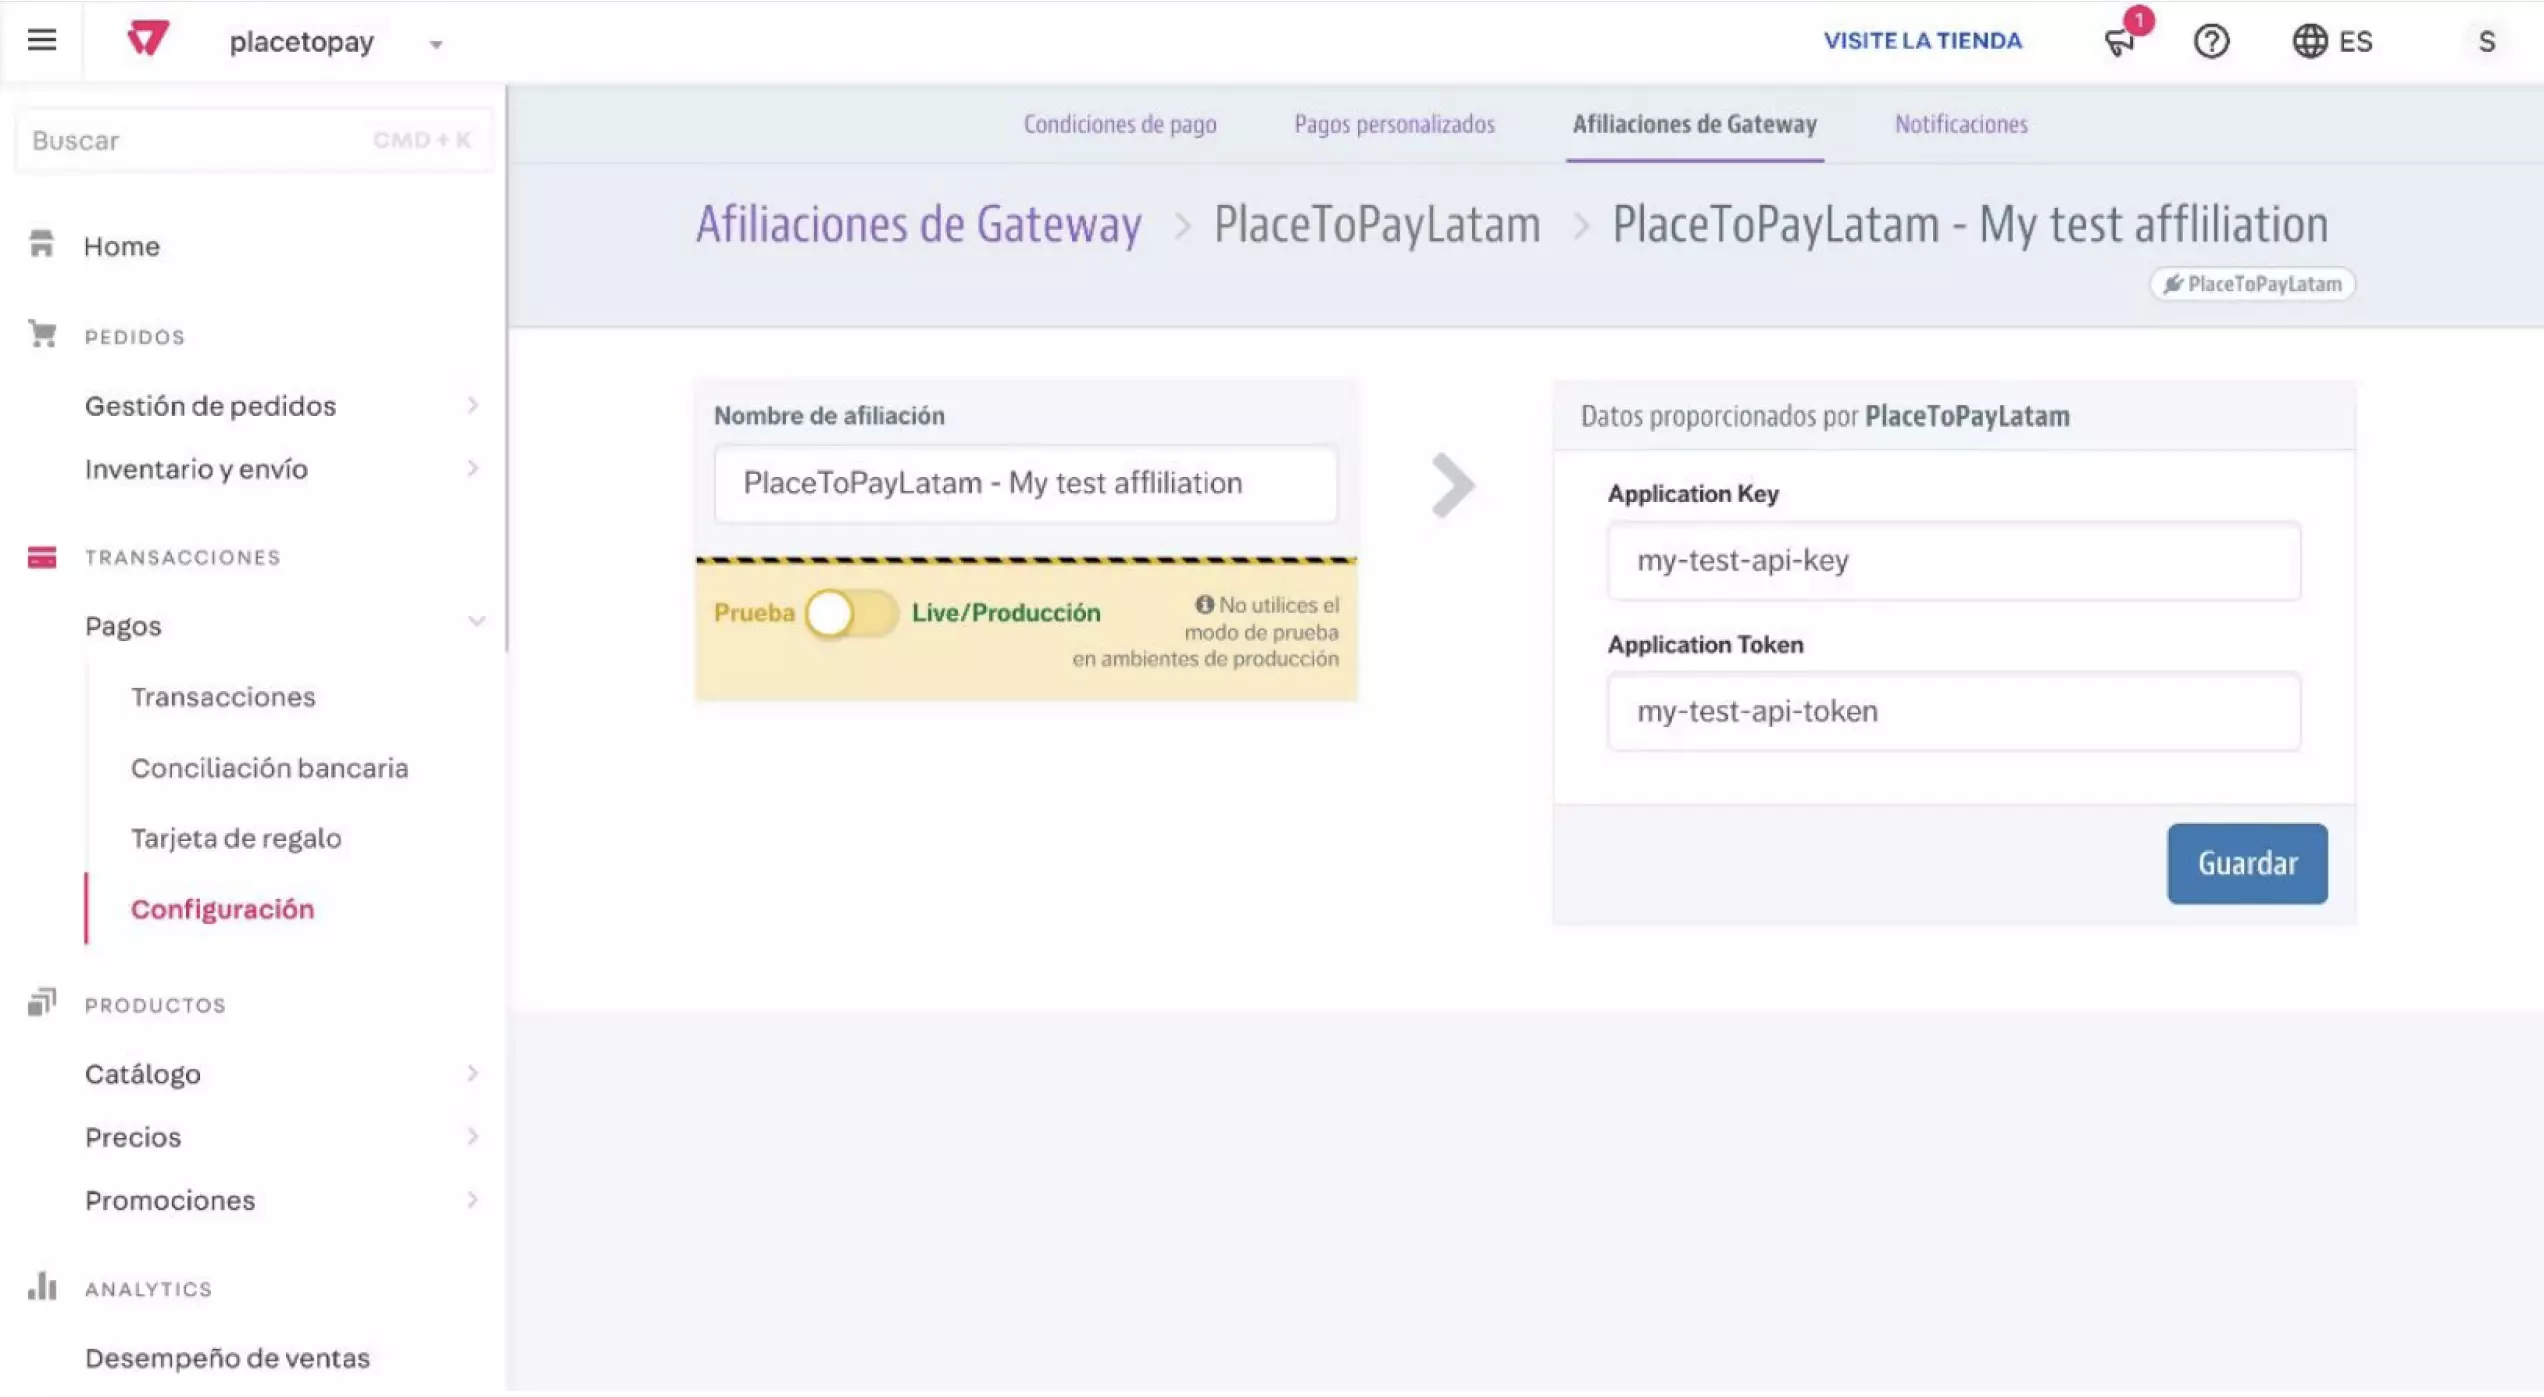
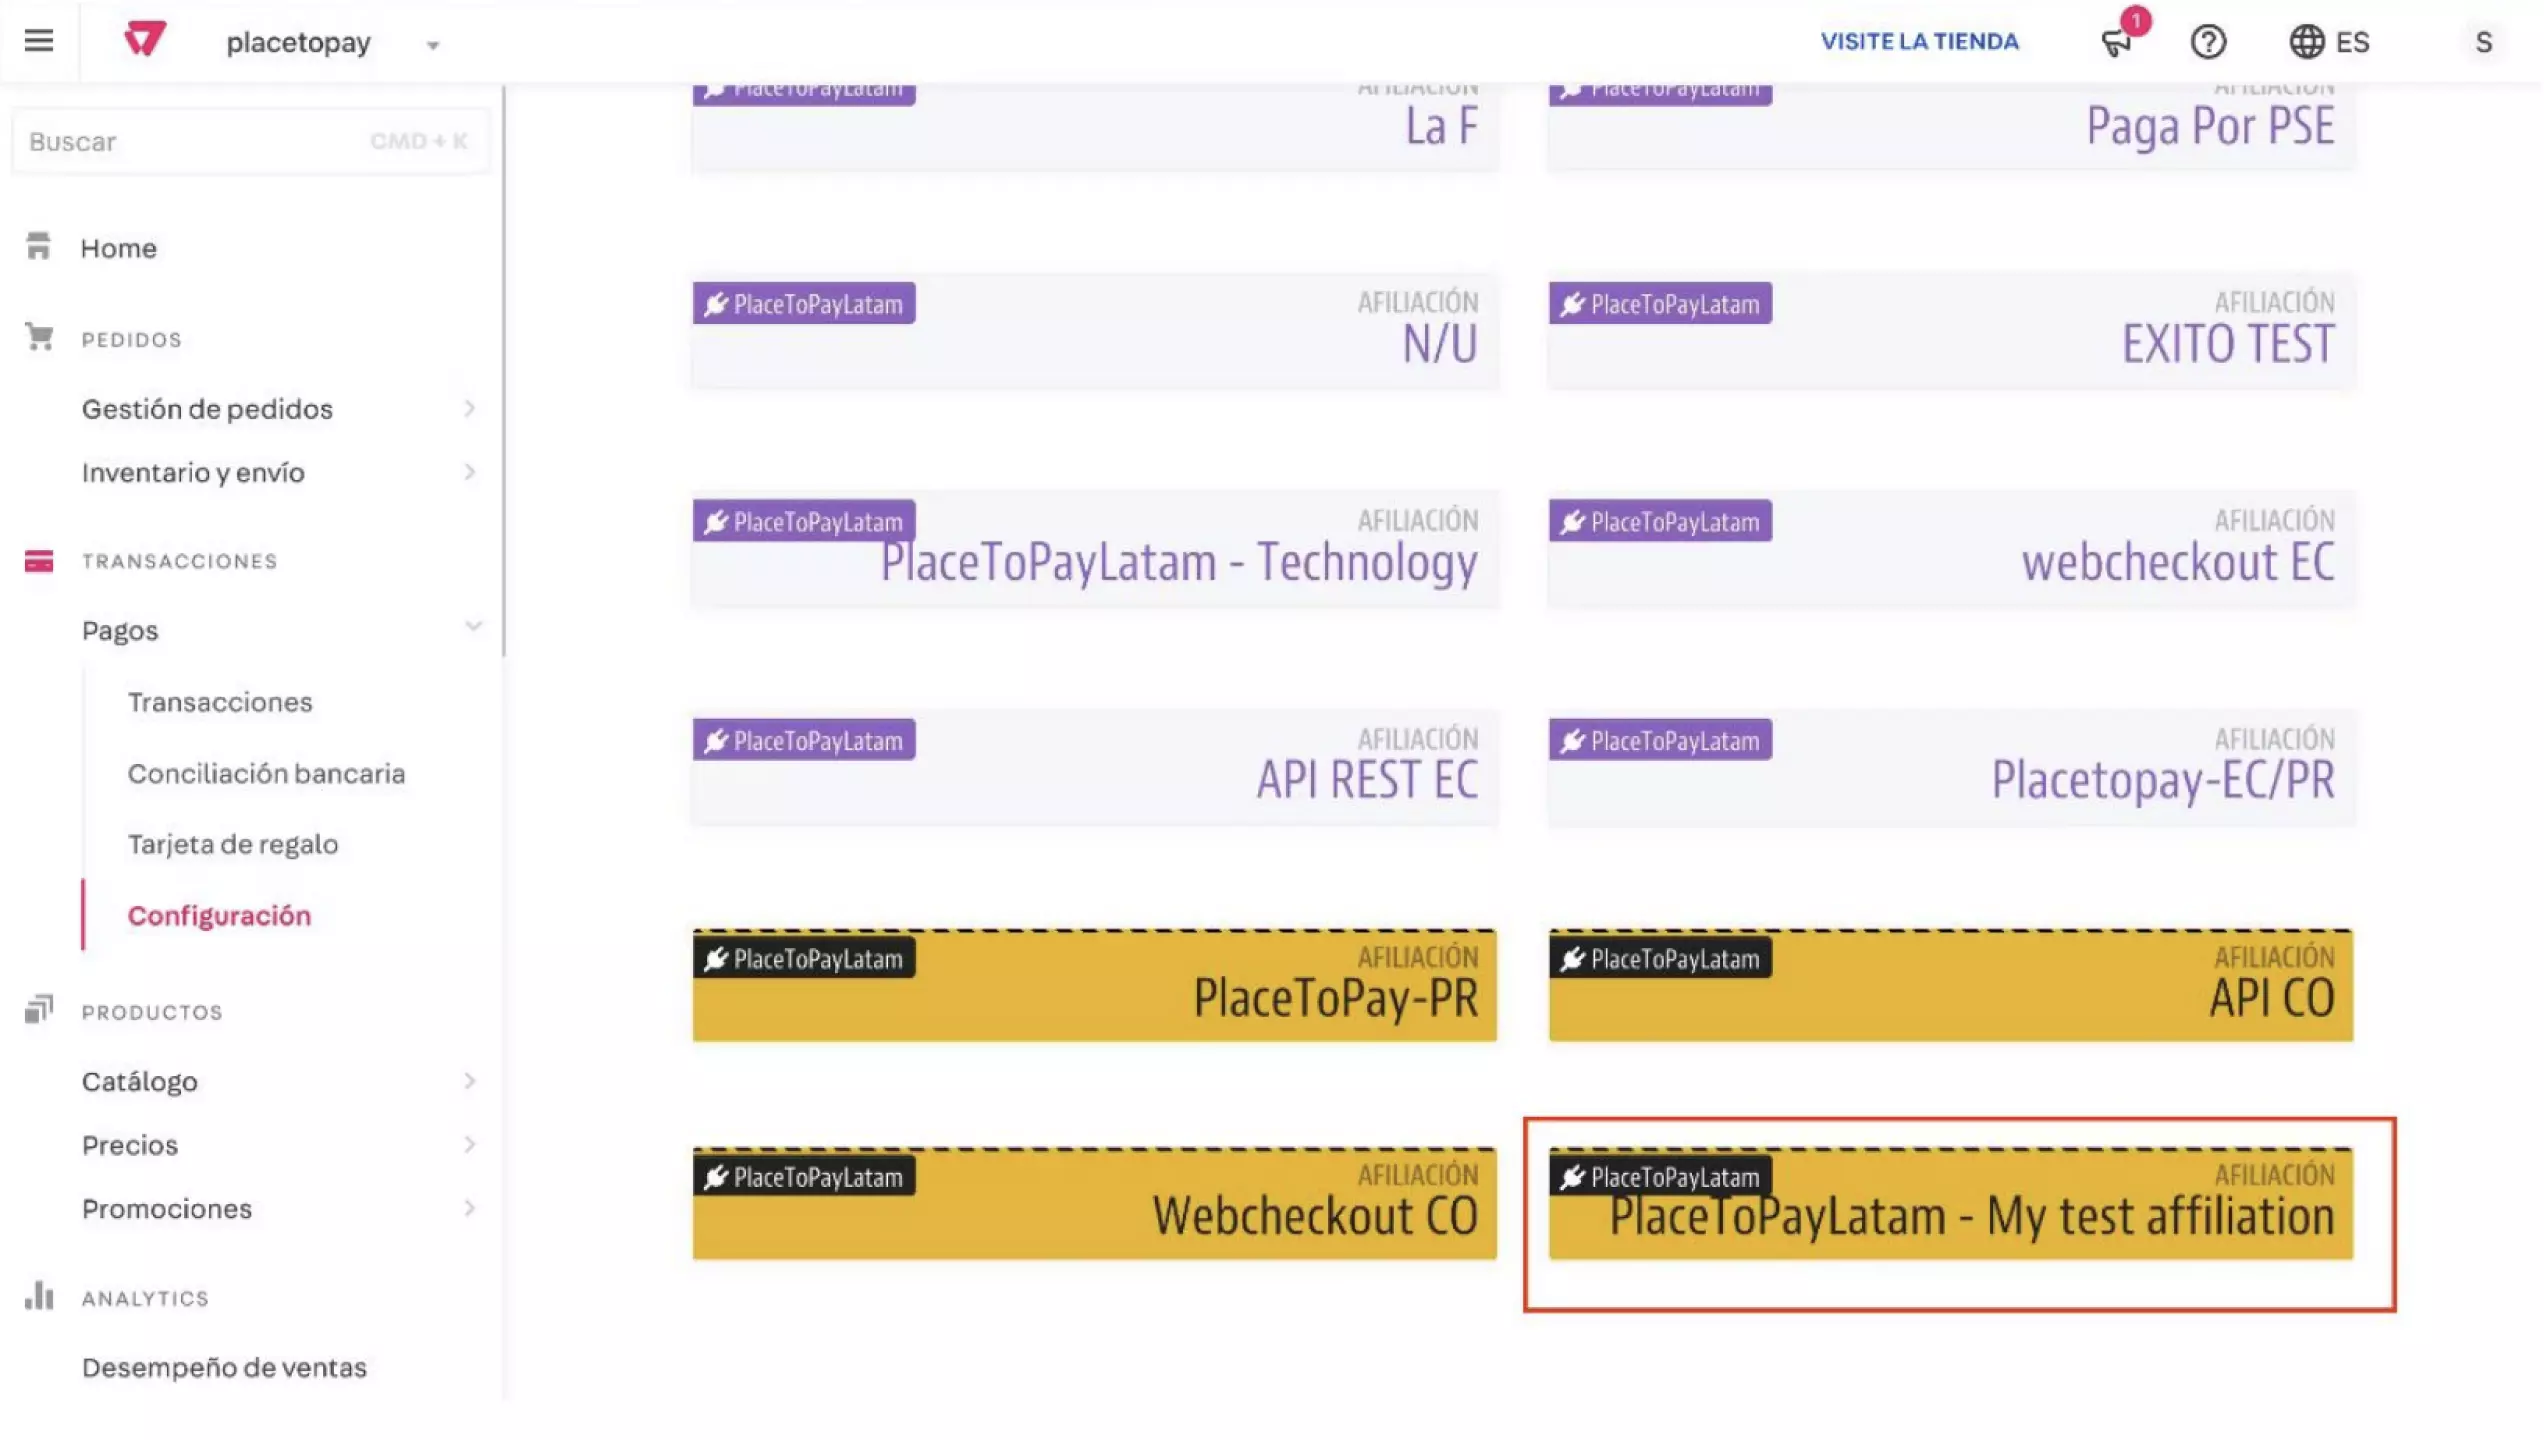
A list of connectors will be displayed, at the bottom you will find the PlaceToPayLatam connector, which you must select. You must take into account something very important, now you have a test environment, this test environment points to an endpoint different from production, therefore, if you select it, the store must be generated under that environment or the payment flow will not work:

Conector PlaceToPayLatam
  1. Once at this point select the test mode and configure the shared credentials.
Configurar credenciales Vtex PlacetoPay
  1. The affiliation will be displayed as follows on the affiliation home page.
Pagina de afiliaciones Vtex
  1. With the payment affiliation generated, you must proceed to configure the payment condition, for this, go to Transactions / Payments / Configuration and is the first interface that can be displayed, similarly, in the main menu of this screen there is a button that says Payment Conditions, in this area, locate again the plus button ( + ) and look for the payment condition placetopay (webcheckout) or the different payment methods (visa, mastercard, etc) for the case of api (rest services).
Buscar la condición de pago de PlacetoPay
  1. The configurations for the payment methods are similar, you must select the affiliation that was generated in the previous step, and if required, add special conditions for that payment.
Condiciones especiales de pago
  1. Test payment To test payments simply follow the flow of buying from the front end and select the payment method of placetopay or credit card (if configured with the placetopay payment condition).
Flujo de compra Front
Plugin Woocommerce

WooCommerce Plugin

See documentation

Plugin Prestashop

Prestashop Plugin

See documentation

Magento Plugin

Magento Plugin

See documentation

Vtex Plugin

Vtex Plugin

See documentation

Plugin Jumpseller

Jumpseller Plugin

See documentation

Plugin Shopify

Shopify Plugin

See documentation